How To Clean The Bumper Sensors On A Self Navigating Vacuum?
Your robot vacuum once glided across the floor like a pro. Now it bumps into walls, spins in circles, or freezes with a “bumper stuck” error. The culprit is often hiding in plain sight. Dirty bumper sensors are one of the most common reasons a self navigating vacuum starts acting strange.
The good news is that you can fix this at home. You do not need a technician. You do not need expensive tools. You just need a few minutes, a soft cloth, and a little patience.
This guide walks you through everything. You will learn what bumper sensors do, why they get dirty, and exactly how to clean them. By the end, your vacuum should move smoothly again and clean your floors the way it used to.
In A Nutshell:
- Bumper sensors detect contact with furniture, walls, and objects. When they get coated with dust, they send wrong signals and your vacuum bumps harder or stops moving completely.
- Always power off and unplug your vacuum before you start. This protects both you and the delicate sensor parts from accidental damage during cleaning.
- Use only soft, dry materials like a microfiber cloth, a soft toothbrush, or a can of compressed air. Harsh chemicals and rough scrubbing can scratch or ruin the sensors.
- The front bumper must move freely. Press it several times. If it sticks, hair or grit is trapped behind it and needs to be removed.
- Clean the sensors regularly, ideally once a week for daily users and once a month for lighter use. Homes with pets or lots of dust need more frequent cleaning.
- Most “bumper stuck” errors clear up after a simple cleaning. If they do not, a reset or firmware update usually solves the problem.
What Are Bumper Sensors And Why Do They Matter
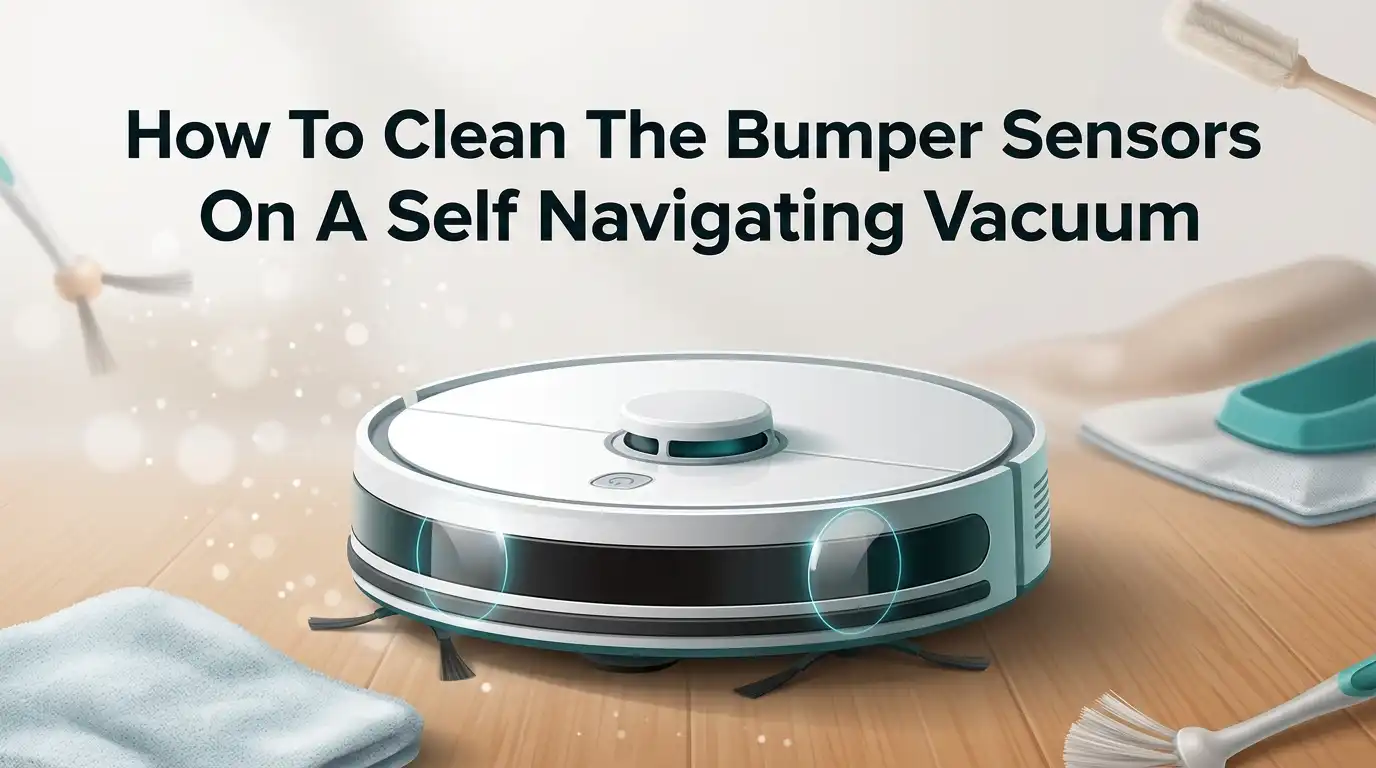
Bumper sensors sit inside the front edge of your robot vacuum. They form the soft, movable strip that touches objects first. When your vacuum nudges a chair leg or a wall, the bumper presses inward. This triggers a signal that tells the robot to turn and go a different way.
These sensors do a big job. They help your vacuum move around clutter, avoid getting trapped, and clean every corner of a room. Without working bumper sensors, the vacuum would slam into furniture at full speed or get stuck in one spot.
Think of them as the vacuum’s sense of touch. When they work well, your vacuum feels its way around your home gently. When they get blocked by dust, they lose that sense and start making mistakes. That is why keeping them clean matters so much.
Signs Your Bumper Sensors Need Cleaning
Your vacuum gives you clues when its sensors are dirty. You just need to know what to watch for. The most obvious sign is a “bumper stuck” error message in the app or a blinking red light on the device.
Other signs show up in how the vacuum behaves. It might bump into walls much harder than usual, as if it cannot feel them coming. It may spin in circles, freeze in the middle of a room, or refuse to leave its dock at all.
You might also notice it missing spots or cleaning the same area twice. Some vacuums beep or stop and ask you to “tap the bumper to unstick.” These behaviors almost always point to a dusty or jammed bumper. If you see any of these, a quick cleaning is usually the first thing to try before you worry about bigger repairs.
Tools And Supplies You Will Need
You do not need much to clean bumper sensors. Most of these items are already in your home. Gathering them first makes the whole job faster and smoother.
Here is what works best:
- A microfiber cloth or any soft, lint free cloth. This wipes away dust without scratching the sensor surface or leaving fibers behind.
- A soft toothbrush or small soft brush. This reaches into tight gaps and loosens dust that a cloth cannot grab.
- A can of compressed air. This blows debris out of cracks and crevices around the bumper and sensors.
- A cotton swab. This cleans small, narrow spots with care and control.
Avoid paper towels, rough rags, and any abrasive sponge. Skip alcohol, glass cleaner, and harsh chemicals too, since these can damage the sensor coating. If you want to use moisture, lightly dampen your cloth with a tiny bit of water and wring it out well first.
Step By Step: How To Clean The Bumper Sensors
Now for the main event. Follow these steps in order and you will get great results. The whole process takes about five to ten minutes.
First, turn off and unplug your vacuum. Set it on a clean, flat surface like a table or the floor. Powering it down protects the electronics and stops it from moving while you work.
Second, press the front bumper in several times. Feel how it moves. A healthy bumper springs back fast and smooth. If it feels sticky or stuck, you have found part of the problem.
Third, wipe the entire bumper strip with your dry microfiber cloth. Move slowly across the whole front edge. Pay extra attention to the small sensor windows, which often look like tiny dark dots or clear panels.
Fourth, use the soft brush or compressed air to clean the seam where the bumper meets the body. Dust loves to hide in this gap. Brush it out or blow it free.
Fifth, power the vacuum back on and run a short test. Watch how it moves around a chair or wall.
How To Clean Behind The Bumper For A Deeper Result
Sometimes a surface wipe is not enough. Hair and grit work their way behind the bumper, where a cloth cannot reach. For these stubborn cases, you may need to go a little deeper.
Many models let you remove the front bumper with a few small Phillips head screws. Check your user manual first to confirm yours is removable. Some bumpers slide into the body, so pull gently and never force the plastic.
Once the bumper is off, you will likely see the cause. The inside is often lined with packed dust, hair, and crumbs. Clean both the bumper piece and the sensor area behind it with your brush and compressed air. Wipe the small sensor contacts gently with a dry cloth.
Pros: This method clears jams that surface cleaning misses and often fixes stubborn “bumper stuck” errors for good.
Cons: It takes more time, requires a screwdriver, and may affect your warranty on some models, so check before you open it up.
Cleaning The Cliff Sensors At The Same Time
While your vacuum is flipped over, take a moment to clean the cliff sensors too. These work closely with the bumper system and often get dirty together. Cliff sensors sit on the underside near the front edge. They look like small shiny or dark windows.
Their job is to stop your vacuum from falling down stairs. They shine infrared light at the floor and watch for sudden drops. When dust covers them, the vacuum gets confused. It may think a flat floor is a cliff and refuse to cross it.
To clean them, simply wipe each one with your soft, dry cloth. A cotton swab works well for the small recessed spots. Pros: This quick extra step prevents false cliff errors and keeps your vacuum moving freely across all your floors. Cons: There really are no downsides, since it adds only a minute to your routine and uses the same tools you already have out.
Dry Cleaning Versus Damp Cleaning: Which Is Better
You have two main approaches for cleaning bumper sensors. Each has its place, and knowing when to use which one helps you get the best result without causing harm.
Dry cleaning uses a cloth, brush, and compressed air only. This is the safest method and the one most manufacturers recommend. It removes dust and loose debris without any risk of moisture damage. Use this for your regular weekly or monthly cleaning.
Damp cleaning uses a slightly moist cloth. This helps with sticky residue, dried spills, or grime that a dry cloth cannot lift. Always wring the cloth out well so it is barely damp, never wet.
Pros of dry cleaning: It is fast, safe, and risk free for sensitive electronics. Cons: It may not remove sticky buildup. Pros of damp cleaning: It tackles tough grime. Cons: Too much moisture can seep into the sensor and cause damage, so use it only when needed and dry the area right after.
Common Mistakes To Avoid While Cleaning
A few simple errors can turn a quick cleaning into a costly mistake. Knowing what not to do is just as important as knowing the right steps. Keep these warnings in mind every time you clean.
Do not use harsh chemicals. Alcohol, bleach, ammonia, and strong cleaners can eat away the sensor coating. Once that protective layer is damaged, the sensor may never read correctly again.
Do not press too hard. The sensors are delicate. Heavy pressure can scratch the surface or push a sensor out of alignment. Always use a light, gentle touch.
Do not use rough materials. Paper towels and scratchy cloths leave tiny marks and lint behind. Stick with soft microfiber.
Do not clean while the vacuum is powered on. This risks both your safety and the device. Finally, do not skip the manual. Each model is built a little differently, and the manual shows you the safest way to handle your specific vacuum.
How Often Should You Clean Bumper Sensors
The right cleaning schedule depends on how you use your vacuum and what your home is like. There is no single answer that fits everyone, but a few simple guidelines help you decide.
If you run your vacuum every day, clean the bumper sensors about once a week. Daily use means daily dust pickup, and that dust spreads to the sensors fast.
For lighter use, like two or three times a week, a cleaning every two weeks to a month works fine. Homes with pets, long hair, or lots of foot traffic need more frequent attention. Pet hair clogs sensors quickly and wraps around moving parts.
Watch for error messages as your real guide. A blinking red light or a “sensor blocked” alert means clean now, no matter your schedule. Building a simple habit, like cleaning sensors when you empty the dust bin, keeps everything running smoothly without you having to remember a strict calendar.
What To Do If Cleaning Does Not Fix The Problem
Sometimes you clean everything and the error still shows up. Do not panic. A few more steps usually solve the issue, and most of them are easy to do yourself.
First, restart your vacuum. A simple reboot clears small software glitches. On many models you press the home and clean buttons together for a few seconds until you hear a sound.
Second, check for a firmware update in the app. Outdated software sometimes causes false bumper errors that a quick update fixes. Manufacturers release these updates to solve known bugs.
Third, try a full reset and remap your home. Delete the old map and let the vacuum learn the layout again. This often corrects strange navigation behavior.
If none of this works, the bumper sensor itself may be faulty. At that point, contact the manufacturer’s customer support. Have your model number, serial number, and a clear description of the problem ready so they can help you faster.
Tips To Keep Your Bumper Sensors Clean Longer
Prevention beats cleaning every time. A few small habits keep your sensors cleaner and cut down how often you need to do a deep clean. These tips also help your whole vacuum last longer.
Tidy the floor before each run. Pick up socks, cords, toys, and small objects. Fewer obstacles means fewer hard bumps and less dust kicked onto the sensors.
Empty the dust bin regularly. A full bin lets dust escape and settle on sensitive parts. Set up no go zones in dusty or cluttered areas using your app to protect the sensors from heavy buildup.
Keep your floors generally clean. The less dust and pet hair on the ground, the less ends up on the bumper. Secure loose cables and remove rugs with long fringe, since these trap the vacuum and stress the bumper.
Doing a quick wipe of the sensors when you empty the bin turns maintenance into an easy, automatic habit you barely notice.
Frequently Asked Questions
Can I use alcohol or wet wipes to clean my robot vacuum bumper sensors?
No, you should avoid alcohol and most wet wipes. These can damage the delicate sensor coating and leave residue that blocks the sensor. A dry, soft microfiber cloth is the safest choice. If you need moisture for sticky grime, use a barely damp cloth and dry the area right after.
Why does my vacuum say “bumper stuck” even after I cleaned it?
If the error stays after cleaning the surface, debris is likely trapped behind the bumper. Press the bumper many times to feel for stickiness. You may need to remove the bumper to clear hidden hair and grit. If it still sticks, try a restart, a firmware update, or contact support.
How do I know if my bumper sensor is broken or just dirty?
Start by cleaning it well. If the vacuum works normally afterward, it was just dirty. If it keeps bumping hard, freezing, or showing errors after a thorough cleaning, reset, and firmware update, the sensor may be faulty. At that point, reaching out to the manufacturer is the best next step.
Is it safe to take apart the bumper myself?
On many models, yes, the bumper comes off with a few small screws. Always check your manual first to confirm. Work gently and never force the plastic. Keep in mind that opening the device may affect your warranty on some brands, so confirm this before you start.
How often should I clean my vacuum’s bumper sensors?
For daily users, once a week is a good target. For lighter use, every two weeks to a month works well. Homes with pets or heavy dust need more frequent cleaning. The simplest rule is to wipe the sensors whenever you empty the dust bin, and always clean right away if you see an error.

Hi, I’m Grace Bell, the founder of CleanFloorVault.com, where I personally test and review vacuum cleaners to help you find the perfect tool for a spotless home.