How To Fix A Bagless Vacuum Dust Cup That Won’t Latch Shut?
Your bagless vacuum makes cleaning easy. You empty the dust cup, snap it back on, and keep going. But one day the cup refuses to click shut.
The latch just will not catch. You push, you press, you wiggle, and nothing holds. Now your vacuum sits useless and your floors stay dirty. Frustrating, right?
The good news is simple. Most dust cup latch problems have easy fixes you can do at home. You do not always need a technician. You do not always need new parts.
Key Takeaways
- Debris is the most common cause. Dust, hair, and grit collect around the latch and rim. A quick clean often solves the whole problem in minutes.
- Alignment matters a lot. Many dust cups only latch when you seat them at the correct angle. Line up the guide marks first, then press.
- The latch spring can weaken or slip. A worn or dislodged spring stops the clip from holding tension. You can reseat or replace it cheaply.
- Overfilling warps and blocks the seal. Never pack the cup past the max fill line. An overstuffed bin pushes the lid open and breaks the latch grip.
- Broken plastic clips need replacement. If the molded tabs snap off, glue rarely lasts. A replacement latch set is the reliable long term answer.
- Regular care prevents most issues. A monthly clean of the latch and gasket keeps the mechanism working for years.
Understand How Your Dust Cup Latch Works
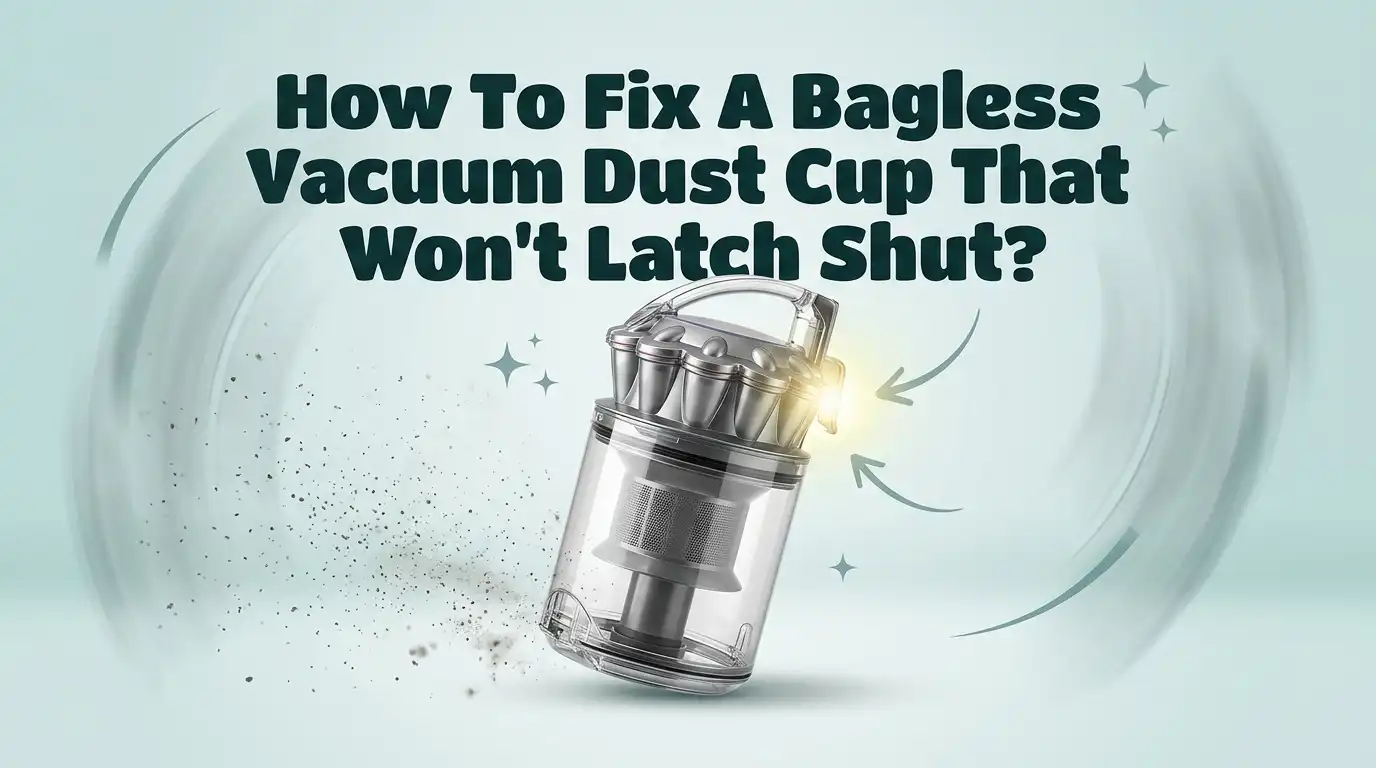
Before you fix anything, you should know how the latch functions. This helps you spot the real problem fast. A bagless dust cup uses a simple locking system. A plastic clip or a spring loaded latch grips a matching notch on the vacuum body or the cup rim.
When you press the cup into place, the latch clicks over the notch and holds. A small spring gives the latch its snap and tension. Without that tension, the clip cannot grab and stay closed.
Some models use flip up levers. Others use molded tabs on the side of the cup. Knowing your type helps you target the fix. Look closely at your latch and watch how it moves. This quick study saves you time and stops you from guessing later.
Start With A Simple Power Off And Safety Check
Safety comes first, always. Before you touch any part of the vacuum, turn it off and unplug it from the wall. For cordless models, remove the battery pack. This stops any accidental start while your hands are near the mechanism.
A spinning fan or motor can push dust into your face or pinch your fingers. You do not want that. So make the machine fully dead before you begin.
Next, work over a trash can or an old newspaper. Dust will fall out during the repair. A clean workspace keeps the mess contained and makes the job easier. Grab a few basic tools too. You may need a flathead screwdriver, a dry cloth, and maybe a small brush. With safety handled, you can now inspect the parts without any risk.
Clean Out Debris Around The Latch And Rim
This is the number one fix, so try it first. Dust, hair, and fine grit gather around the latch and the top rim of the cup. Even a thin layer stops the parts from meeting cleanly. The latch then cannot reach the notch, so it will not click.
Take a dry cloth and wipe every contact point. Pay close attention to the groove where the lid meets the cup. A soft brush or a cotton swab reaches the tight spots a cloth misses.
Do not skip the notch on the vacuum body either. Debris hides there too. Clean both the male and female parts of the latch until they look spotless. After cleaning, try to snap the cup shut again. Many people find this simple step fixes the problem completely.
Pros: This method is free, fast, and needs no tools. Cons: It only works when debris is the cause, so a broken part will still need more work.
Check The Dust Cup Alignment Carefully
Sometimes the latch is fine, but the cup sits wrong. Many bagless vacuums only latch when the cup lines up at the exact right angle. If you push it on crooked, the clip never meets the notch.
Look for guide marks, arrows, or tabs on both the cup and the vacuum body. These show you how the pieces should fit together. Line up these marks before you press down.
Seat the bottom of the cup first, then tilt the top into place. A slight twist often helps the cup drop into its correct spot. You should feel it settle before you hear the click.
Pros: Correct alignment costs nothing and solves many mystery latch failures. Cons: It takes a little patience, and some older cups have worn guide marks that are hard to see.
Inspect The Latch Spring For Damage Or Slippage
If cleaning and alignment fail, look at the spring. The latch spring gives the clip its snap and holding power. Over time, this spring can weaken, stretch, or pop out of place. When that happens, the latch feels loose and will not hold.
Find the small spring behind or beside the latch clip. On many models you can pop off the orange or red clip with a flathead screwdriver. Work gently so you do not crack the plastic.
Once open, check if the spring sits in its slot. A dislodged spring often just needs to be pushed back into position. If the spring looks bent or broken, you will need a new one.
Pros: Reseating a spring is quick and free. Cons: Springs are tiny and can ping away when you open the latch, so work over a bowl to catch it.
Look For Broken Or Worn Plastic Clips
Plastic parts do not last forever. The molded clips on the side of the dust cup are a common failure point. Years of pressing and releasing make them brittle. Eventually they crack or snap right off.
Run your finger along each clip and check for cracks. A broken tab will feel loose or missing when you compare it to the other side.
If a clip is gone, the cup cannot lock at all. Glue rarely holds because the clip takes constant stress. A replacement dust cup or a replacement latch set is the lasting fix here. Used parts for popular models are easy to find online through parts suppliers.
Pros: A new clip or cup fully restores the latch and lasts for years. Cons: You must buy a part, and finding the exact match for your model takes some searching.
Fix An Overfilled Dust Cup Problem
This cause is easy to overlook. An overstuffed dust cup pushes against the lid and stops it from closing. When you pack dirt past the fill line, the pressure fights the latch. The clip cannot grip because the lid sits too high.
Empty the cup completely. Tap it against the trash can to loosen packed dust. Check for a max fill line inside the cup and never load past it.
Compacted debris near the top rim also blocks the seal. Scrape out any hard packed dirt so the lid can sit flat again. After emptying, the latch should snap shut with a clean click.
Pros: This fix is free and takes seconds once you spot it. Cons: If you overfill often, the constant strain can warp the lid over time and cause a permanent problem.
Examine And Replace A Worn Gasket Or Seal
The rubber gasket seals the cup and helps the latch hold firm. A worn, torn, or missing gasket lets the lid sit unevenly. This throws off the latch and lets dust leak out too.
Look at the rubber ring around the lid or the base of the cup. Press it to check if it feels cracked, flat, or sticky.
A hardened gasket cannot compress, so the lid never settles into its locked spot. Replacing the gasket is usually cheap and quick. Just pull out the old ring and press the new one into the same groove.
If you cannot get a new gasket right away, a wrap of painters tape around the opening works as a short term patch. Pros: A fresh gasket restores a tight seal and firm latch. Cons: Tape is only a temporary bandage and will not hold for long.
Lubricate A Stiff Or Stuck Latch Mechanism
Some latches do not move freely. Dust and grime can gum up the moving parts so the lever or clip sticks. When the latch cannot travel its full range, it will not lock shut.
Turn the cup or the vacuum body so you can reach the latch. Drip a small amount of silicone lubricant into the mechanism. Avoid heavy oils, since they attract more dust and make things worse.
Work the latch open and closed several times. This spreads the lubricant and frees up the stuck parts. After a few cycles, the latch should move smoothly and click into place.
Pros: A quick lube fixes stiff latches and costs very little. Cons: Too much lubricant creates a sticky mess that grabs dust, so use only a tiny amount.
Reset The Latch By Manually Testing Its Movement
Sometimes the latch just needs a manual reset. The clip or lever can settle into a half stuck position where it neither opens nor closes right. A hands on test often frees it.
Hold the cup separately from the vacuum. Press the latch button or lever and watch how far the clip moves. It should spring back fully when you let go.
If it moves slow or gets stuck partway, press it several times in a row. This flexing can snap the clip back into its normal path. Then hold the latch open, seat the cup, and release the latch onto the notch.
Pros: Manual testing needs no tools and shows you exactly what the latch is doing. Cons: It only works for minor sticking, so a truly broken clip will still fail this test.
Replace The Entire Dust Cup Assembly
When repairs do not hold, replacement is the smart move. A new dust cup assembly gives you a fresh latch, fresh clips, and a fresh seal all at once. This is the surest way to end a stubborn latch problem for good.
Find your vacuum brand and model number, usually printed on a label on the body. Order the exact matching cup from a parts supplier or the manufacturer.
Removing the old cup is simple. Most slide or twist off with the release button. Snap the new cup into place and test the latch to confirm it clicks. The whole swap takes just a few minutes.
Pros: A full replacement solves every latch, clip, and seal issue in one step. Cons: It costs the most of any fix and you must wait for the part to arrive.
Know When To Contact The Manufacturer Or A Pro
Some problems go beyond a home fix. If your vacuum is still under warranty, contact the manufacturer before you open anything. DIY repairs can void your coverage, and the company may send a free replacement part.
Reach out if the latch failure comes with other faults, like a dust bin error light or a motor that will not run. These signs point to a deeper issue inside the machine.
A repair shop can help when parts are hard to find or the damage is complex. A pro has the right tools and access to model specific components. Weigh the repair cost against the price of a new vacuum before you decide.
Pros: Warranty service is often free and expert repair saves you guesswork. Cons: Repairs can be slow, and out of warranty service sometimes costs more than the vacuum is worth.
Prevent Future Latch Problems With Simple Maintenance
A little care keeps your latch working for years. Empty the dust cup before it reaches the fill line every time. This stops the pressure that warps lids and strains clips.
Wipe the latch, rim, and gasket clean once a month. A dry cloth and a soft brush remove the dust that jams the mechanism.
Handle the latch gently. Do not force it or slam the cup shut, since rough use cracks the plastic tabs. Store the vacuum in a dry spot so the gasket stays flexible and the springs do not rust.
Check the parts now and then for early wear. Pros: Simple habits cost nothing and extend the life of your whole vacuum. Cons: It takes a few minutes of regular effort, which is easy to forget without a reminder.
Frequently Asked Questions
Why does my vacuum dust cup pop open while I clean?
Your latch has lost its grip. The most likely reasons are a worn spring, a broken plastic clip, or debris around the notch. Clean the contact points first, then check the spring and clips. If the cup keeps popping open, a replacement latch or cup will fix it for good.
Can I glue a broken dust cup latch clip?
You can try, but glue rarely lasts. The clip takes constant stress each time you open and close the cup. Most glue joints crack again within days. A replacement latch set or a new dust cup is the reliable answer for a snapped clip.
Is it safe to use my vacuum with tape holding the cup shut?
Tape works only as a short term patch. It can hold the cup for a cleaning session or two. But tape lets dust leak and does not seal well. Order the correct part soon and use tape only until it arrives.
How often should I clean the dust cup latch?
Aim for once a month with regular use. Wipe the latch, the rim, and the gasket with a dry cloth. Use a small brush for the tight spots. This simple habit stops most latch failures before they start.
Will an overfilled dust cup really break the latch?
Yes, over time it can. An overstuffed cup pushes the lid up and strains the latch on every close. This repeated pressure can warp the lid and crack the clips. Always empty the cup before it passes the fill line.
Where can I find a replacement dust cup for my model?
Check the label on your vacuum body for the brand and model number. Search that number on the manufacturer website or a trusted parts supplier. Used parts for popular models are often available online too. Match the number exactly for a proper fit.

Hi, I’m Grace Bell, the founder of CleanFloorVault.com, where I personally test and review vacuum cleaners to help you find the perfect tool for a spotless home.