Why Is My Robot Vacuum Spinning In Circles And Stopping?
Your robot vacuum used to glide across the floor in neat rows. Now it just twirls in one spot, stops, and beeps at you. It feels like the little machine forgot how to do its only job.
This problem frustrates almost every robot vacuum owner at some point. The good news is simple. Most spinning and stopping issues come from dirt, stuck parts, or small software glitches.
You can fix the majority of them yourself in under thirty minutes. You usually do not need a repair shop or a new vacuum.
Key Takeaways
- Dirty sensors cause most spinning. Cliff sensors and wheel encoders pick up dust and lint fast. Wipe them with a dry microfiber cloth and the spinning often stops.
- A stuck bumper confuses your vacuum. When the bumper jams in the pressed position, the robot thinks it hit a wall forever. Tap and wiggle the bumper to free it.
- Wheel problems break straight movement. Hair and string wrap around the wheels and axles. One wheel slows down, so the robot turns instead of going forward.
- A weak or dying battery makes it stop. If the vacuum spins then quits, the battery may not hold enough charge. A fresh battery often fixes random shutdowns.
- Software glitches need a reset. A simple restart or firmware update clears bad navigation data. This is the easiest fix and the first one to try.
- Clean it weekly to prevent the problem. Most owners ignore maintenance. Regular cleaning of sensors, wheels, and brushes stops the issue from coming back.
What Causes A Robot Vacuum To Spin In Circles And Stop
Your robot vacuum moves straight because of teamwork. Its sensors, wheels, and software all share data with the brain inside. When one part sends wrong information, the robot gets confused. It cannot tell which way is forward. So it turns in place and then gives up.
The most common causes are dirty cliff sensors, a stuck bumper, tangled wheels, a failing battery, and software bugs. Sometimes the spinning happens because the vacuum thinks it is near a ledge.
Other times one wheel cannot turn properly. The stopping usually points to a battery or error issue. Each cause has a clear fix. Once you find the right one, the repair is fast and easy.
Clean The Cliff Sensors First
Cliff sensors sit on the bottom front edge of your vacuum. They look like small black or clear windows. Their job is to stop the robot from falling down stairs. They shine infrared light at the floor and read the bounce back.
When dust or pet hair covers these sensors, the robot gets bad readings. It thinks every spot is a deadly cliff. So it spins and backs away from nothing. To fix this, flip the vacuum over. Wipe each sensor gently with a dry microfiber cloth. You can use a cotton swab for the corners. Do not use water or harsh sprays.
Pros: This fix is free, fast, and works for most spinning cases. You need only a cloth.
Cons: Sensors get dirty again quickly. You must clean them often, sometimes weekly with pets in the home.
Check And Free The Bumper
The bumper is the springy front panel that absorbs gentle bumps. It tells the robot when it touches a wall or chair leg. When the bumper sticks in the pressed position, the robot believes it is always hitting something. So it keeps turning to escape an obstacle that is not there.
Press the bumper in and out several times. You should hear and feel a soft click each time. Tap it 15 to 20 times, alternating left and right sides. This dislodges trapped dust and crumbs. If the bumper feels loose or off track, line it up and push it back into its slot.
Pros: Quick and tool free. It often solves stubborn spinning right away.
Cons: A cracked or broken bumper needs a replacement part. Some models make bumper removal tricky.
Remove Hair And Debris From The Wheels
Your vacuum has two main drive wheels. Each one must spin at the same speed for straight travel. When hair, string, or carpet fibers wrap around a wheel or its axle, that wheel slows down or jams. The robot then circles toward the slow side.
Flip the vacuum over and look at both wheels. Push each wheel up and down and spin it by hand. It should move freely. Pull off any tangled hair with your fingers or scissors. Check the small caster wheel at the front too. Dirt builds up there and blocks smooth movement.
Pros: Cheap and effective. It also improves overall cleaning quality.
Cons: Tightly wrapped hair can be hard to remove. Some wheels need a screwdriver to open the housing.
Clean The Wheel Encoders
Wheel encoders are small sensors that count how fast each wheel turns. They tell the brain whether the robot moves straight or curves. This part causes circling more often than people realize. Experts point to dirty encoders as a hidden reason for endless turning.
If one encoder is blocked or dirty, the robot thinks one wheel is not moving. It then keeps correcting by turning. To clean them, remove the wheel module if your model allows it. Wipe the small optical sensor inside with a dry swab. Blow out dust with a can of compressed air.
Pros: Fixes a problem that sensor cleaning alone misses. It targets the real cause for many vacuums.
Cons: Reaching the encoder needs some disassembly. Beginners may find this step harder than the others.
Inspect And Clean The Brushes
The side brush and main roller brush sit underneath your vacuum. They sweep dirt toward the suction inlet. When these brushes get tangled or jammed, they create drag that throws off balance. The robot may spin or stop because a motor strains too hard.
Turn the vacuum over. Pull out the main brush and clear away hair and threads. Many models include a small cleaning tool with a blade for this. Check the side brush spinner too. A bent side brush can push the robot in circles. Straighten it or replace it if it is badly warped.
Pros: Easy maintenance that boosts suction and movement. It prevents motor overheating.
Cons: Brushes wear out over time. You will need to buy replacements eventually.
Restart And Reset The Robot Vacuum
Sometimes the hardware is fine but the software acts up. A bad navigation map or a frozen sensor reading can make the robot spin and stop. A restart clears the temporary memory and gives the brain a fresh start.
Turn the vacuum off using its power switch. Wait about ten seconds. Turn it back on. For a deeper reset, hold the power or clean button for 10 to 20 seconds until you hear a chime. Check your manual for the exact reset combination. After the reset, place the robot on its dock and let it find its position again.
Pros: This is the fastest fix of all. It costs nothing and takes seconds.
Cons: A reset may erase your saved cleaning maps. You might need to run a new mapping cycle.
Update The Firmware Through The App
Robot vacuum makers release software updates often. These updates fix bugs in the navigation system. If your robot started spinning after it worked fine for months, a buggy update or a missing one may be the cause.
Open your vacuum’s companion app on your phone. Go to the settings or device info screen. Look for a firmware or software update option and install any pending version.
Keep the robot on its dock and connected to WiFi during the update. Do not turn it off mid update. A fresh firmware version often smooths out erratic movement and stopping.
Pros: Fixes deep software bugs that cleaning cannot touch. Updates are free and automatic on most models.
Cons: You need a working WiFi connection and the app. Rarely, a new update introduces its own bugs.
Test And Replace The Battery
If your robot spins for a moment and then stops dead, the battery is a top suspect. A worn battery cannot deliver steady power, so motors stutter and the robot quits early. Owners often see the vacuum stop at random charge levels like 50 percent.
Check the battery age. Most robot vacuum batteries last two to three years. If yours is older, it may hold less charge each cycle. Reseat the battery by removing and reinserting it to fix loose contacts. If problems continue, install a fresh battery. Use a battery that matches your model closely.
Pros: A new battery restores full runtime and stops random shutdowns. It extends the life of the whole machine.
Cons: Batteries cost money. Some users report that off brand batteries trigger errors, so quality matters.
Clean The Charging Contacts And Dock
A vacuum that spins, returns to the dock, and stops may have a charging problem. If the metal charging contacts are dirty, the robot cannot refill its battery properly. It then runs out of power fast and behaves strangely.
Look at the two metal strips on the bottom of the robot and the matching pads on the dock. Wipe them with a dry cloth or a soft eraser to remove grime.
Make sure the dock sits against a wall on a hard, flat floor. Keep about three feet of clear space on each side so the robot can find its way back.
Pros: Simple and quick. It solves docking and charging confusion.
Cons: This fix helps only if charging is the root cause. It will not solve sensor or wheel problems.
Move The Vacuum To A Better Surface
Where your robot starts matters more than you think. Dark floors, shiny tiles, and thick rugs can trick the cliff sensors and wheels. A black rug may read like a hole, so the robot spins to avoid it. A high pile carpet can trap a wheel and cause turning.
Pick the robot up and set it on a flat, light colored hard floor. Start a cleaning cycle there and watch how it moves. If it goes straight on the new surface, your floor type was the trigger. You can place small barriers or use no go zones in the app to keep the robot off problem areas.
Pros: Helps you spot floor based causes fast. It needs no tools at all.
Cons: It is a test, not a full fix. You may need to adjust your home layout or settings.
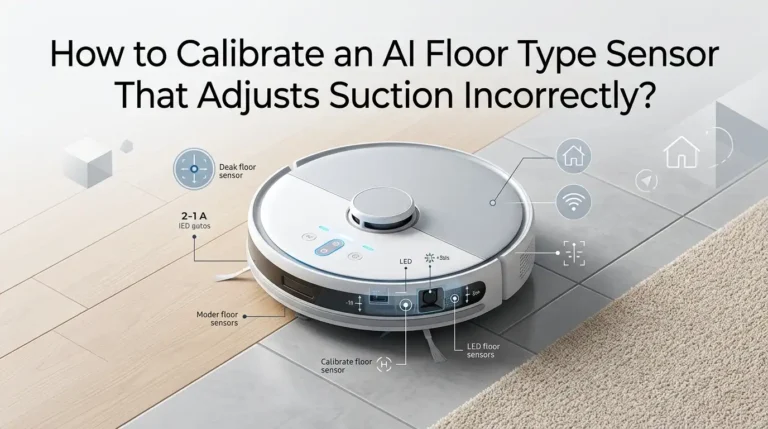
Calibrate The Gyroscope And Sensors
Many modern vacuums use a gyroscope to track direction. The gyroscope calibrates itself the moment you power on the robot. If you move or bump the vacuum during this short startup, it can drift. The robot then curves or spins instead of driving straight.
To recalibrate, place the vacuum flat on the floor or its dock. Power it on and do not touch or move it for at least ten seconds. Let it sit still while the sensors set their baseline. Some apps include a calibration or recalibration button under maintenance settings. Run that option if your model offers it.
Pros: Fixes drifting and curving with no parts needed. It is a smart fix for newer mapping robots.
Cons: Not all models let you calibrate manually. The benefit fades if the gyroscope hardware is faulty.
When To Contact Support Or Replace Parts
You have cleaned, reset, updated, and tested. The robot still spins and stops. At this point, the problem is likely a hardware failure inside the machine. A dead encoder, a burnt out wheel motor, or a damaged main board needs professional help.
Contact the maker’s support team first. Share what you tried and any error codes or beep patterns. Many brands offer free repair or replacement under warranty. If your vacuum is out of warranty, weigh the repair cost against a new unit. Replacement wheel modules and bumpers are often cheap and easy to swap yourself.
Pros: Support can diagnose deep faults you cannot see. Warranty service may cost you nothing.
Cons: Repairs take time and may involve shipping. Older models sometimes have no spare parts left.
How To Prevent Spinning And Stopping In The Future
Prevention beats repair every time. A clean robot vacuum almost never spins in circles. Most issues trace back to skipped maintenance. A short routine keeps your machine happy for years.
Wipe the cliff sensors and charging contacts once a week. Clear the wheels and brushes of hair after every few cleaning runs. Empty the dustbin regularly so the filter stays clear.
Keep the firmware up to date through the app. Store the robot on its dock in an open, dry spot. Avoid letting it run over cords, socks, and small toys that jam the wheels. These small habits stop the problem before it starts.
Frequently Asked Questions
Why does my robot vacuum spin in circles only sometimes?
Random spinning usually points to dirty sensors or a slightly stuck bumper. Dust builds up gradually, so the problem comes and goes. Clean the cliff sensors and bumper, then watch if the pattern stops. A loose battery contact can also cause it now and then.
Can a dirty filter make my robot vacuum stop and spin?
Yes, a clogged filter can. When suction drops, the motor works harder and may overheat or trigger an error. The robot then stops or moves oddly. Empty the dustbin and clean or replace the filter regularly to keep airflow strong.
How often should I clean my robot vacuum sensors?
Clean them at least once a week. Homes with pets or carpets need cleaning every few days. A quick wipe with a dry microfiber cloth takes under a minute. This single habit prevents most spinning issues from ever showing up.
Will resetting my robot vacuum delete my cleaning maps?
A full reset can erase saved maps on many models. A simple power restart usually keeps your maps safe. Try the basic restart first. If you must do a factory reset, expect to run a new mapping cycle afterward to rebuild the floor plan.
Is it worth fixing a robot vacuum that keeps spinning?
For most cases, yes. Cleaning, resets, and cheap parts like wheels or bumpers fix the issue affordably. If the main board or motor fails on an old, out of warranty unit, replacement may make more sense. Check repair cost against the price of a new model.
Why does my robot vacuum spin then go back to the dock?
This often means a low or failing battery. The robot senses it cannot finish and heads home to charge. If the battery is old or the charging contacts are dirty, it may stop mid cycle. Clean the contacts and test the battery to solve it.

Hi, I’m Grace Bell, the founder of CleanFloorVault.com, where I personally test and review vacuum cleaners to help you find the perfect tool for a spotless home.