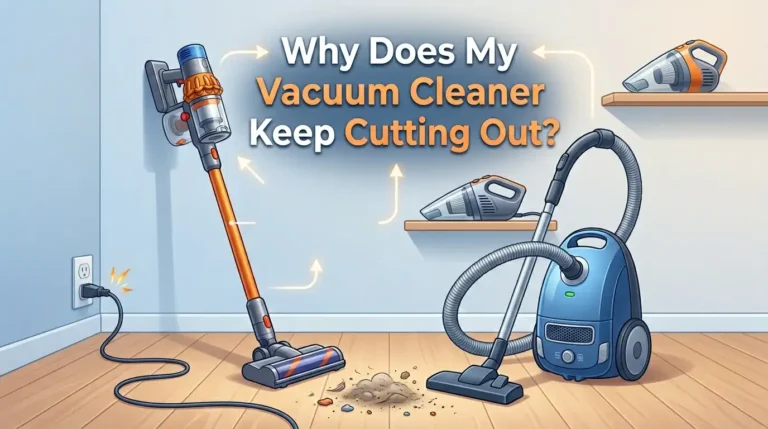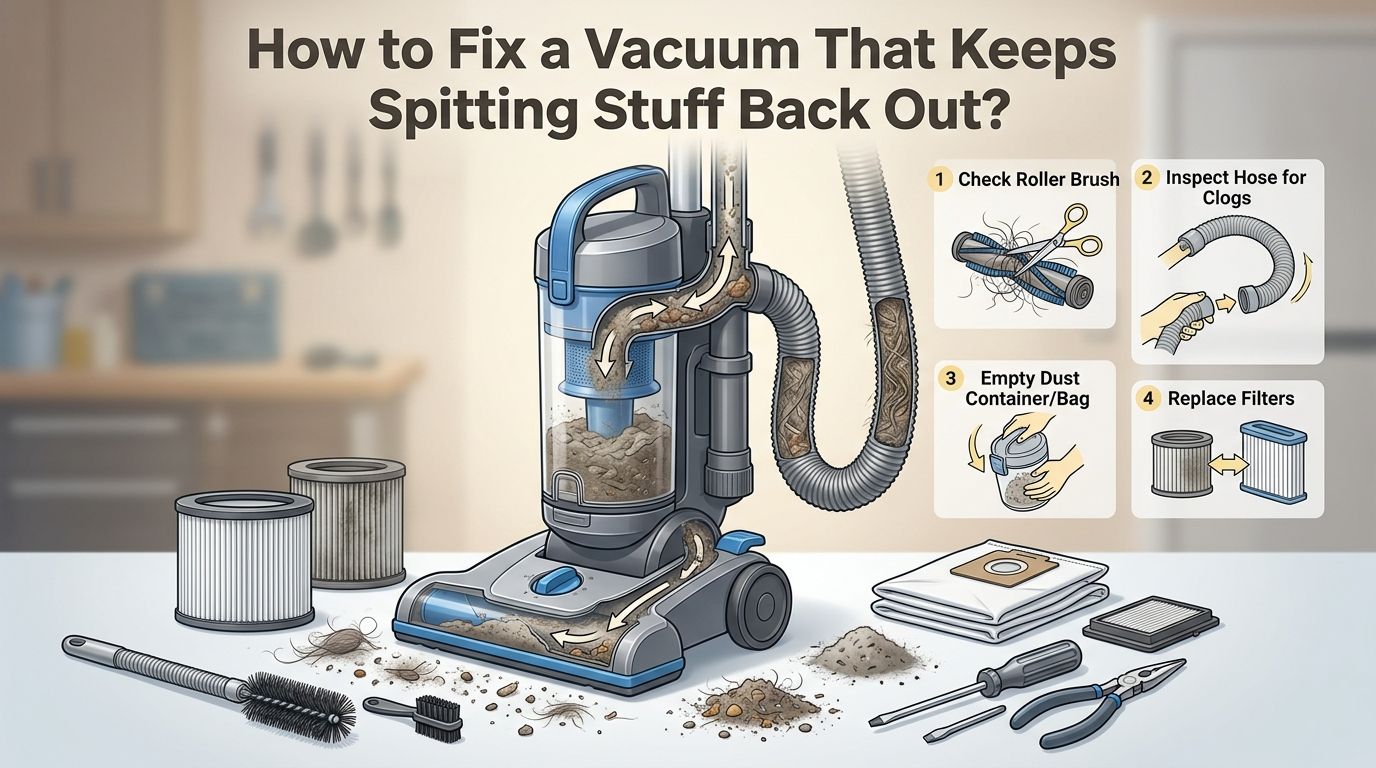
How to Fix a Vacuum That Keeps Spitting Stuff Back Out?
You just started vacuuming your living room and noticed something strange. Your vacuum is pushing dirt, dust, and debris right back onto the floor.
Instead of cleaning, it is making things worse. This is a frustrating problem, and you are not alone. Thousands of homeowners deal with this exact issue every single week.
The good news? Most causes of a vacuum spitting stuff back out are simple to diagnose and fix at home. You do not need to be a repair expert. You do not need to buy a brand new machine right away. In most cases, the solution takes less than 30 minutes with tools you already have.
In a Nutshell
- Clogs are the number one reason your vacuum spits stuff out. Dirt, hair, food crumbs, and small objects can build up inside the hose, brush roller area, or dust cup air duct. A clog blocks airflow and forces debris back onto the floor instead of into the collection bin.
- A dirty or damaged filter kills suction power. Filters trap fine particles and keep your vacuum running strong. A clogged filter restricts airflow, and a torn filter lets dust blow right through the exhaust.
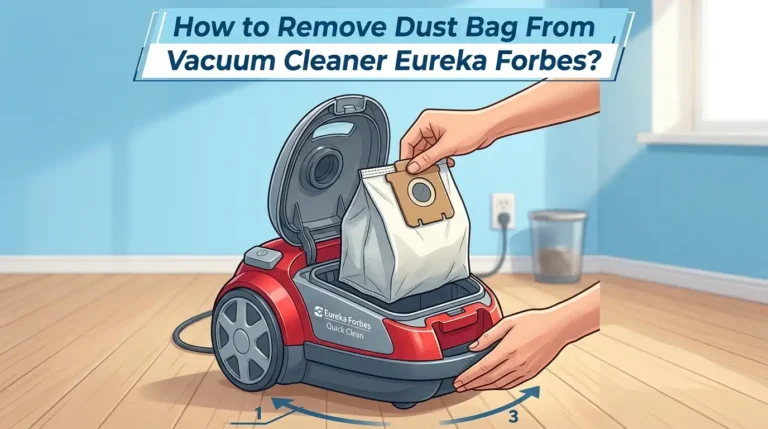
- A full dust bag or canister leaves no room for new debris. Your vacuum cannot collect dirt if the container is already packed. Always empty or replace it before it reaches the maximum fill line.
- Broken seals and loose connections create gaps in the airflow system. Even a small gap lets dust escape and reduces the vacuum’s ability to pull debris inward. Check every connection point for cracks and proper fit.
- An incorrect height setting or wrong operating mode can cause your vacuum to scatter debris. Hard floors require a lower setting, while thick carpets need a higher one. Using the wrong mode on a multi function vacuum can reverse the intended airflow.
- Regular maintenance prevents most spitting problems before they start. A quick monthly inspection of the hose, filter, belt, and brush roller saves you from bigger headaches down the road.
How to Tell If Your Vacuum Has a Clog Causing the Problem
A clog is the most common cause of a vacuum spitting debris back out. Dirt, pet hair, food crumbs, and small household items can get stuck inside the vacuum’s airflow path. This blocks suction and forces the brush roller to scatter debris instead of pulling it in.
There are three main areas where clogs form. The first is behind the brush roller at the base of the vacuum. The second is inside the hose that connects the base to the main body. The third is inside the dust cup air duct where debris travels into the bin.
To check for a clog, unplug the vacuum first. Remove the hose and look through it. If you cannot see light on the other end, a clog is present. You can also listen for changes in the motor sound. A higher pitched whine often signals restricted airflow caused by a blockage.
Pros of fixing clogs yourself: Free, fast, and solves the problem most of the time.
Cons: Deep clogs may require disassembly that feels tricky on certain vacuum models.
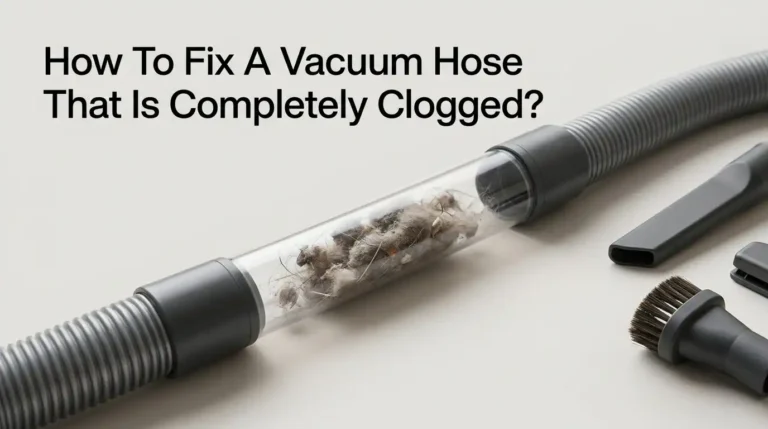
How to Clear a Clogged Vacuum Hose Step by Step
Start by unplugging your vacuum from the power source. Safety comes first. Then disconnect the hose from both the base and the main body of the vacuum. Some models use screws while others snap off. Check your user manual if you are unsure.
Hold the hose up to a light source and look through it. If you see a blockage, use the handle end of a broom or a long, blunt stick to gently push the clog out. Avoid using sharp objects like coat hangers. A wire hanger can puncture the hose, which will create a permanent air leak.
For stubborn buildup inside the hose, pour half a cup of baking soda in and shake it around. Then add half a cup of white vinegar. Let it fizz for two to three minutes. Rinse the hose with warm water until the water runs clear. Hang the hose with both ends pointing down and let it dry completely for at least one hour before reattaching it.
Pros of the baking soda method: Removes buildup and odors at the same time.
Cons: You must wait for the hose to fully dry before using the vacuum again.
How to Clean or Replace a Dirty Vacuum Filter
A dirty or clogged filter is the second most common reason your vacuum blows dust back out. Filters trap fine particles like dust mites, pollen, and pet dander. Over time, these particles build up and choke the airflow. Your vacuum then struggles to pull in new debris.
Remove the filter from its compartment. Most vacuums have one or two filters. Check your manual for the exact location. If the filter is washable, rinse it under lukewarm running water. Gently squeeze out the dirt. Do not use soap unless the manufacturer says it is safe.
Let the filter air dry completely before putting it back. A damp filter can grow mold and reduce performance even further. If the filter looks torn, discolored, or worn thin, replace it entirely. Most manufacturers recommend replacing filters every three to six months depending on use.
Pros of regular filter cleaning: Restores suction power and improves air quality in your home.
Cons: HEPA filters can be delicate and may need replacement rather than washing.
How to Fix the Problem When Your Dust Bag or Canister Is Full
This one is simple but easy to overlook. A full dust bag or canister leaves zero room for new debris. When there is no space, the vacuum cannot hold what it picks up. Dirt and dust get blown right back out through the exhaust or around loose seals.
Check your bag or canister before every cleaning session. Most manufacturers recommend emptying or replacing the bag when it is about two thirds full, not completely stuffed. A bag that is too full also puts extra strain on the motor, which shortens the vacuum’s lifespan.
If you use a bagless vacuum, empty the canister over a trash bag and wipe the inside with a dry cloth. Make sure the canister clicks back into place firmly. A loose canister creates gaps that let dust escape. For bagged vacuums, make sure the new bag is the correct size and seats properly in the compartment.
Pros of staying on top of this: Takes less than a minute and prevents most suction issues.
Cons: Forgetting this basic step is surprisingly common, especially during busy weeks.
How to Check and Repair Damaged Seals and Connections
Your vacuum relies on an airtight system to create suction. Brushes, hoses, dust containers, and filters all connect to form a sealed path for airflow. If any of these connections are loose, cracked, or missing a gasket, air escapes. The vacuum loses suction power and debris gets blown around.
Inspect each connection point one at a time. Start at the base where the hose attaches. Check for cracks in the plastic housing. Look at the rubber gaskets and O rings. If a gasket feels stiff, flat, or cracked, it needs replacement.
Move to the dust bin or bag compartment. Make sure the lid clicks shut completely. Some vacuums have a latch that wears out over time. You can often find replacement seals and gaskets at hardware stores or through the vacuum manufacturer’s website.
Pros of fixing seals: Inexpensive parts restore full suction power.
Cons: Finding the exact replacement gasket for older models can take some searching.
How to Untangle and Clean a Wrapped Up Brush Roller
A tangled brush roller is a sneaky cause of vacuum spitting. Hair, string, thread, and carpet fibers wrap tightly around the roller over time. This reduces the roller’s spin speed and blocks the gap where debris enters the suction path.
Flip your vacuum over and look at the brush roller. If you see a thick layer of hair or thread wound around it, that is your problem. Unplug the vacuum. Use scissors or a seam ripper to carefully cut along the length of the roller. Pull the cut hair and fibers away with your fingers or tweezers.
Some vacuums let you pop the roller out for easier cleaning. Check if your model has end caps that twist off. Once the roller is clean, spin it by hand. It should rotate freely with no resistance. If it does not spin well, the bearings may be worn and the roller may need replacing.
Pros of cleaning the brush roller: Restores pickup ability and reduces strain on the belt.
Cons: Requires regular attention, especially in homes with pets or long haired family members.
How to Fix a Twisted or Broken Drive Belt
The drive belt connects the motor to the brush roller. It makes the roller spin. If the belt is twisted, stretched, or broken, the roller may spin in the wrong direction or not spin at all. A reversed roller literally pushes debris out instead of pulling it in.
Turn your vacuum over and remove the bottom plate. The belt loops around the motor shaft and the brush roller. If the belt looks loose, cracked, or has lost its elasticity, replace it. A new belt should feel tight and firm when stretched between the motor shaft and roller.
Pay attention to the direction the belt wraps. A belt installed backwards will spin the roller in reverse, which causes the vacuum to spit debris forward. Refer to your manual or look for directional arrows stamped on the bottom plate. After installing the new belt, test the vacuum on a small area to confirm it picks up properly.
Pros of belt replacement: Belts are cheap and the fix takes about 10 minutes.
Cons: Installing the belt incorrectly can make the problem worse.
How to Set the Correct Height for Your Floor Type
Many people overlook this setting, but it has a big impact on performance. Vacuums with adjustable height settings let you raise or lower the cleaning head. The wrong height means the vacuum either hovers too far above the surface or presses too tight against it.
For hard floors like tile, laminate, and hardwood, set the vacuum to the lowest height. This brings the suction close to the surface and prevents debris from scattering. For low pile carpets, move one or two clicks up. For thick, plush carpets, use a higher setting so the brush roller can move freely.
If the vacuum sits too high on a hard floor, air rushes under the base and blows dust around. If it sits too low on thick carpet, the roller bogs down and the motor strains. Check your user manual for specific height recommendations for your model. A quick adjustment takes seconds and can solve the entire spitting problem.
Pros: Free and instant solution.
Cons: Easy to forget when switching between different rooms and floor types.
How to Make Sure You Are Using the Right Vacuum Mode
Some modern vacuums offer multiple modes or functions. Certain models double as blowers, air compressors, or hand held cleaners. If your vacuum is set to the wrong mode, it may push air outward instead of pulling it inward.
Check the mode selector switch or dial on your vacuum. Make sure it is set to the standard vacuuming or suction mode. Some models have a switch near the hose attachment that toggles between suction and blowing functions. It is surprisingly easy to bump this switch by accident during storage or while moving the vacuum between rooms.
If your vacuum has a power boost or turbo mode, try switching to that setting. Sometimes the standard mode does not provide enough suction for heavy debris or fine dust on certain surfaces. A quick mode change can make a noticeable difference.
Pros: Takes two seconds to check and fix.
Cons: Not all vacuums have mode selectors, so this may not apply to your model.
How to Inspect the Suction Motor for Deeper Issues
If you have cleaned the hose, replaced the filter, emptied the bin, and checked every seal but the vacuum still spits stuff out, the suction motor may be the issue. A failing motor cannot generate enough airflow to pull debris into the collection bin.
Listen to the motor when you turn the vacuum on. A healthy motor produces a consistent, steady hum. A motor that is struggling may sound weak, make grinding noises, or cut in and out. A burning smell is a strong sign that the motor is overheating or has damaged internal components.
Motor repairs are usually beyond the scope of a home fix. Contact the manufacturer if your vacuum is still under warranty. For out of warranty machines, a local vacuum repair shop can diagnose the motor and give you a repair estimate. Sometimes replacing the motor costs less than buying a new vacuum.
Pros of professional repair: Saves money compared to replacing the entire vacuum.
Cons: Repair costs can still add up, and older models may not have available parts.
How to Prevent Your Vacuum From Spitting Stuff Out in the Future
Prevention is always better than repair. A few simple habits will keep your vacuum running strong and stop the spitting problem from returning.
Empty the dust bin or replace the bag after every two to three uses. Do not wait until it is completely packed. Clean or replace the filter every three months, or more often if you have pets. Check the brush roller for wrapped hair and thread at least once a month.
Inspect the hose for cracks or buildup every few weeks. Run the vacuum on a small test area after every cleaning or reassembly to make sure suction feels normal. Store your vacuum upright in a dry place to prevent moisture damage to the seals and motor.
Pick up large debris like coins, paper clips, and small toys by hand before vacuuming. These items cause clogs fast. Following these steps adds only a few minutes to your routine, but it saves you hours of troubleshooting later.
How to Decide If You Should Repair or Replace Your Vacuum
Sometimes a vacuum has reached the end of its useful life. Knowing when to repair and when to replace saves you both time and money. A good rule of thumb is the 50% rule. If the repair cost is more than 50% of what a quality replacement costs, it makes more sense to buy new.
Consider the age of your vacuum. Most upright vacuums last five to eight years with proper care. If your vacuum is near the end of that range and has multiple failing parts, replacement is the smarter move. A newer model will also be more energy efficient and may offer better filtration.
However, if only one part is broken and the rest of the vacuum works well, a repair is worth it. Belts, filters, hoses, and seals are all affordable parts. The key is to be honest about the overall condition of the machine. If you find yourself fixing a new issue every month, that is a clear sign the vacuum is wearing out.
Frequently Asked Questions
How to Know If My Vacuum Filter Needs Replacing or Just Cleaning?
Hold the filter up to a light source. If light passes through easily, a good wash is enough. If the filter looks gray, matted, or has visible tears, replace it. Most washable filters last about 12 months. HEPA filters that cannot be washed should be replaced every six months. Always let a washed filter dry completely before reinstalling it to avoid mold growth.
How to Stop My Vacuum From Blowing Dust Out the Back?
Dust blowing from the exhaust almost always points to a clogged or damaged filter. Remove the filter and clean or replace it. Also check that the dust bin or bag is not full. If the filter and bin are fine, inspect the hose and all connection points for cracks or loose fits. A small air leak near the motor housing can also push fine dust out the back.
How to Fix a Vacuum That Spits Dirt Only on Hard Floors?
This usually means the height setting is too high for the hard floor surface. Lower the vacuum to its lowest height setting. This brings the suction opening closer to the floor and stops air from rushing underneath and scattering dust. If your vacuum does not have a height adjustment, check whether the brush roller can be turned off. Using suction only mode on hard floors often solves this problem.
How to Tell If My Vacuum Belt Is Installed Backwards?
A backwards belt spins the brush roller in reverse. Place the vacuum on the floor and turn it on briefly. Watch the direction the roller spins. The bristles should sweep debris backward and inward toward the suction channel. If they push debris forward and outward, the belt is on the wrong way. Flip the vacuum over, remove the bottom plate, and reverse the belt.
How to Clean a Vacuum Hose Without Damaging It?
Use a broom handle or a long, blunt rod to push out clogs. Never use sharp wire or metal hangers. For a deeper clean, flush the hose with a mixture of baking soda and vinegar followed by warm water. Let the hose air dry completely with both ends pointing downward. Drying takes at least one hour. Reattach the hose only when it is fully dry to prevent mold and electrical issues.

Hi, I’m Grace Bell, the founder of CleanFloorVault.com, where I personally test and review vacuum cleaners to help you find the perfect tool for a spotless home.