How to Fix a Vacuum Cleaner Roller Not Spinning?
Your vacuum cleaner sounds like it is running fine. The motor hums. The suction seems strong. But you look down and your carpet looks the same as before you started cleaning. The roller is not spinning.
This is one of the most common vacuum cleaner problems, and it affects almost every brand and model at some point. The good news is that this issue is usually caused by a handful of predictable problems.
Most of them are easy to fix at home with basic tools. In this guide, you will learn exactly what causes a vacuum roller to stop spinning and how to get it working again, step by step.
In a Nutshell
- Hair and debris wrapped around the roller is the number one reason your vacuum brush roll stops spinning. A quick cleaning session with scissors or a seam ripper can solve this in minutes.
- A worn, stretched, or broken belt is the second most common cause. Belts are cheap and easy to replace at home. If your vacuum smells like burning rubber, the belt is almost certainly the problem.
- Your vacuum might be in the wrong mode. Many modern vacuums have a hard floor setting that turns off the brush roll. A simple switch flip may be all you need.
- Clogged airways and full dustbins can stall the roller by reducing airflow. Empty your dustbin and check for blockages in the hose and intake channel before assuming something is broken.
- Bearings on the brush roll can wear out over time. If the roller feels gritty, stiff, or wobbly when you spin it by hand, the bearings may need attention or replacement.
- Motor and electrical problems are less common but possible. If you have tried all the basic fixes and the roller still will not spin, a faulty brush motor or damaged wiring might be the cause. This is the point where a professional repair shop can help.
How to Identify Why Your Vacuum Roller Stopped Spinning
The first step to fixing anything is figuring out what went wrong. A vacuum roller can stop for mechanical, electrical, or airflow related reasons. Start by unplugging the vacuum and flipping it over to look at the roller area.
Try spinning the roller by hand. If it does not move at all, something is physically blocking it or the bearings are seized. If it spins freely by hand but not when the vacuum is on, the belt or motor is likely the issue. Listen closely when you turn the vacuum on. A change in motor pitch or a burning smell gives you strong clues.
Pros of diagnosing first: You avoid wasting time and money replacing parts you do not need. Cons: Some issues, like internal motor faults, are hard to spot without professional tools.
How to Remove Hair and Debris From Your Vacuum Roller
Hair buildup is the single most common cause of a brush roll that will not spin. Long hair, pet fur, string, and carpet fibers wrap around the roller over time. They compress into tight layers that bind the roller so firmly the motor cannot turn it.
Unplug your vacuum and lay it on its back. Look at the brush roll. If you see a thick layer of tangled hair, grab a pair of scissors or a seam ripper. Carefully cut along the length of the roller, slicing through the wrapped material. Pull the cut debris away with your fingers.
After cleaning, rotate the roller by hand. It should spin smoothly with very little resistance. Do this every few weeks to prevent buildup.
Pros: This fix is free and takes less than 10 minutes. Cons: If the hair has damaged the bristles, you may need a new roller.
How to Check and Replace a Worn Vacuum Belt
The belt connects the motor shaft to the brush roller. It transfers power so the roller spins. Over time, belts stretch, crack, and lose their grip. A stretched belt is the second most common cause of a roller that will not spin.
Remove the bottom plate of your vacuum to access the belt. Look for these warning signs: the belt feels loose or slack, it has a glossy or melted appearance, it has visible cracks, or it has snapped entirely. A burning rubber smell during use is a strong indicator that the belt is slipping.
Replacement belts are inexpensive and specific to your vacuum model. Slide the new belt around the motor shaft and loop the other end over the roller. Reassemble the bottom plate and test.
Pros: Belt replacement costs very little and solves the problem fast. Cons: Belts that break repeatedly may signal a deeper alignment issue inside the brush chamber.
How to Inspect and Fix Brush Roll Bearings
Even with a clean roller and a good belt, the brush roll itself can seize. Each end of the roller sits in a bearing or end cap housing. Dust, fine hair, and grit work their way into these bearings over months of use. Eventually, they gum up, corrode, or wear out.
Remove the brush roll from the vacuum. Spin each end individually with your fingers. A healthy bearing feels smooth and free. A failing bearing feels gritty, stiff, or wobbly. Clean the end caps with a dry cloth and remove any debris packed into the bearing area.
If cleaning the bearings does not help, the brush roll or bearings may need replacement. This varies by model, so check your owner’s manual for the correct part.
Pros: Cleaning bearings extends roller life at no cost. Cons: Replacing bearings at home can be tricky because parts differ widely between models.
How to Make Sure Your Vacuum Is in the Right Cleaning Mode
Many modern vacuums have multiple floor settings. Hard floor mode often disables the brush roll to protect delicate surfaces like hardwood and tile. If someone accidentally switched your vacuum to hard floor mode, the roller simply will not engage.
Check the controls on your vacuum for a floor type selector or a brush roll on/off switch. Switch it to carpet mode and test the roller again. Some vacuums also have indicator lights that show whether the brush roll is active.
This is a surprisingly common fix that gets overlooked. Before you take anything apart, always check the settings first.
Pros: This fix takes about two seconds. Cons: Not all vacuum models have this feature, so it may not apply to yours.
How to Adjust Vacuum Height Settings for Proper Roller Contact
Vacuum cleaners with adjustable height settings let you raise or lower the cleaning head based on your floor type. If the height is set too high, the roller may not make contact with the surface. If it is set too low, the roller can dig into thick carpet and stall.
Look for a height adjustment dial or lever on your vacuum. Set it to the lowest position for bare floors and gradually raise it for thicker carpets. The roller should spin freely without excessive resistance from the carpet pile.
An incorrect height setting does not just stop the roller. It also reduces cleaning performance and can strain the motor over time.
Pros: Adjusting the height is quick and simple. Cons: Finding the right setting for your specific carpet can take a bit of trial and error.
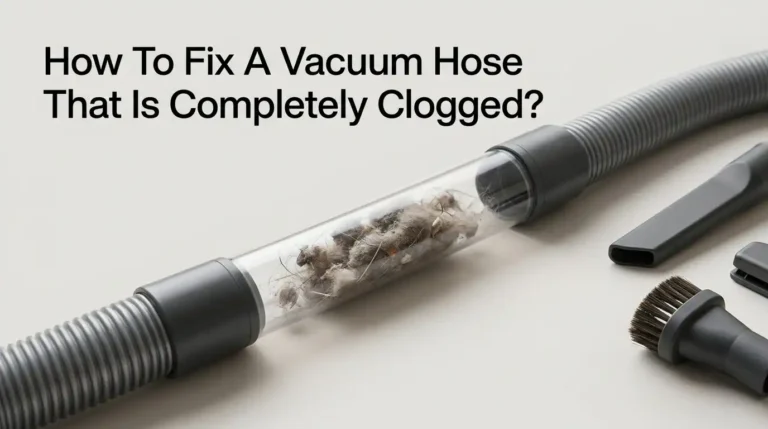
How to Clear Clogs in the Vacuum Airway and Hose
A vacuum depends on proper airflow to keep everything running well. Blockages in the hose, intake channel, or elbow joints create back pressure. Some vacuums respond to restricted airflow by shutting off the brush roll as a safety measure to prevent overheating.
Disconnect the hose from the vacuum body. Look through it for clumps of dust, small objects, or compressed debris. Use a long handle, like a broom stick, to push blockages out gently. Also inspect the intake area directly behind the brush roll for anything wedged in the channel.
Check the lower hose or elbow joint on upright models. A kinked or collapsed hose restricts airflow and can stall the roller.
Pros: Clearing clogs restores suction and roller function at the same time. Cons: Some clogs are deep inside the machine and hard to reach without partial disassembly.
How to Empty and Maintain Your Dustbin to Prevent Roller Problems
An overfull dustbin or bag does more damage than most people realize. When the container is packed, it blocks air circulation inside the vacuum. This reduces suction, strains the motor, and can cause the brush roll to stop spinning.
Empty your dustbin after every use or at least when it reaches the fill line. If your vacuum uses bags, replace them before they are completely stuffed. A bag that is 75% full already reduces performance.
Also wipe the dustbin with a dry cloth to remove fine dust that clings to the walls. Check and clean the filter at the same time. A dirty filter has the same choking effect on airflow as a full dustbin.
Pros: Regular emptying is free and takes 30 seconds. Cons: Forgetting this simple step leads to bigger problems over time.
How to Check the Brush Roll Motor and Electrical Connections
Some vacuum models use a separate small motor inside the cleaning head to power the brush roll. This motor operates independently from the main suction motor. If you hear the main motor running but do not hear the quieter hum of the brush motor, an electrical issue may be the cause.
Check for frayed or pinched wires inside the hose or wand. Inspect the connection between the vacuum head and the main body. Loose plugs or corroded contacts can interrupt power delivery to the brush motor.
If you suspect a motor failure, this is the point where professional help makes sense. Testing continuity and diagnosing electrical faults requires proper tools and experience.
Pros: Identifying the motor as the issue saves you from replacing other parts unnecessarily. Cons: Motor and wiring repairs are difficult to do safely at home.
How to Reassemble Your Vacuum After Fixing the Roller
After cleaning, replacing parts, or clearing clogs, proper reassembly is critical. Loose seals and gaps between components can prevent the roller from spinning even after you have fixed the original problem.
Make sure the brush roll sits securely in its housing on both ends. Confirm the belt is properly looped around the motor shaft and the roller. Snap the bottom plate back firmly until you hear it click into place. Check that no wires are pinched between panels.
Turn the vacuum on and test the roller on carpet. Watch for smooth, consistent spinning. If the roller spins briefly and then stops, something is still misaligned or the belt tension is off.
Pros: Careful reassembly prevents repeat issues. Cons: Rushing this step often leads to the same problem coming back within days.
How to Prevent Your Vacuum Roller From Stopping in the Future
Prevention is always easier than repair. Most brush roll failures come from neglected maintenance rather than sudden part failure. A few simple habits will keep your roller spinning for years.
Clean hair and debris from the roller every two to four weeks. Replace belts on the schedule recommended by your vacuum’s manufacturer. Empty the dustbin after every cleaning session. Check the roller bearings once every few months by removing the brush roll and spinning each end by hand.
Avoid vacuuming up large objects, coins, socks, or anything that could jam behind the roller. Pick these up by hand before you start cleaning. Also keep the hose and airway paths clear by inspecting them monthly.
Pros: Routine maintenance costs almost nothing and prevents most roller failures. Cons: It requires a few minutes of effort that is easy to skip.
How to Know When It Is Time to Call a Professional for Vacuum Repair
Sometimes the problem runs deeper than what you can fix at home. You should take your vacuum to a repair shop if the roller still will not spin after cleaning and replacing the belt, if the motor smells hot or changes pitch, or if the roller spins briefly then stops under load.
Other signs include rough or seized bearings, a completely silent brush motor, and any suspected wiring problems inside the wand or hose. A trained technician sees these patterns daily and can pinpoint the exact cause without the trial and error of replacing parts one by one.
Professional repair often costs less than buying a new vacuum. A good repair shop can diagnose the problem quickly and get your machine back to full performance.
Pros: You get an accurate diagnosis and proper repair. Cons: It costs more than a DIY fix and requires a trip to the shop.
Frequently Asked Questions
How do you fix a vacuum brush roll that does not spin?
Start by unplugging the vacuum and checking for hair or debris wrapped around the roller. Clean it off with scissors. Then inspect the belt for wear or breakage and replace it if needed. Check the floor mode setting, clear any clogs in the airway, and empty the dustbin. If none of these steps work, the bearings or brush motor may need professional attention.
Why does my vacuum smell like burning rubber when the roller stops?
A burning rubber smell almost always means the belt is slipping or melting against the motor shaft. This happens when the roller is jammed by debris or when the belt has stretched too far to maintain proper tension. Replace the belt and clean the roller to fix this issue.
How often should you replace a vacuum cleaner belt?
Most manufacturers recommend replacing the belt every 6 to 12 months depending on usage. If you vacuum frequently or have pets, replace it closer to every 6 months. A stretched belt reduces roller performance long before it actually snaps.
Can a clogged filter cause the vacuum roller to stop spinning?
Yes. A clogged filter restricts airflow inside the vacuum. Some models have safety features that shut off the brush roll when airflow drops too low to prevent overheating. Clean or replace your filters regularly to maintain proper roller function and suction power.
Is it worth repairing a vacuum roller or should you buy a new vacuum?
In most cases, repairing the roller is far cheaper than buying a new vacuum. A belt replacement costs very little, and even a full brush roll replacement is a fraction of the price of a new machine. Only consider replacement if the main motor has failed or if repair costs exceed half the price of a comparable new vacuum.

Hi, I’m Grace Bell, the founder of CleanFloorVault.com, where I personally test and review vacuum cleaners to help you find the perfect tool for a spotless home.