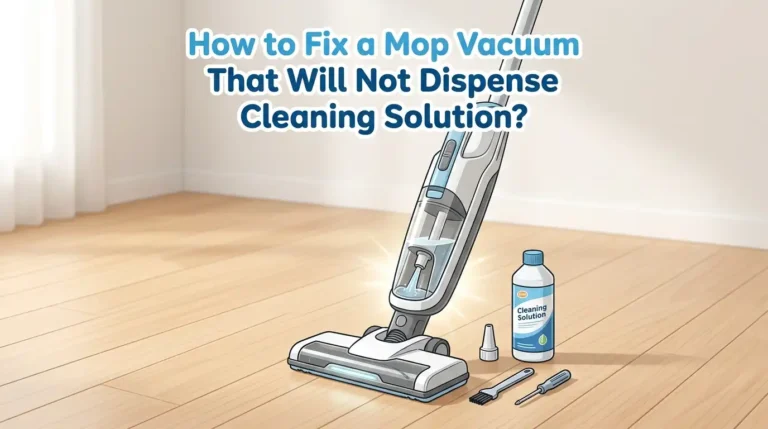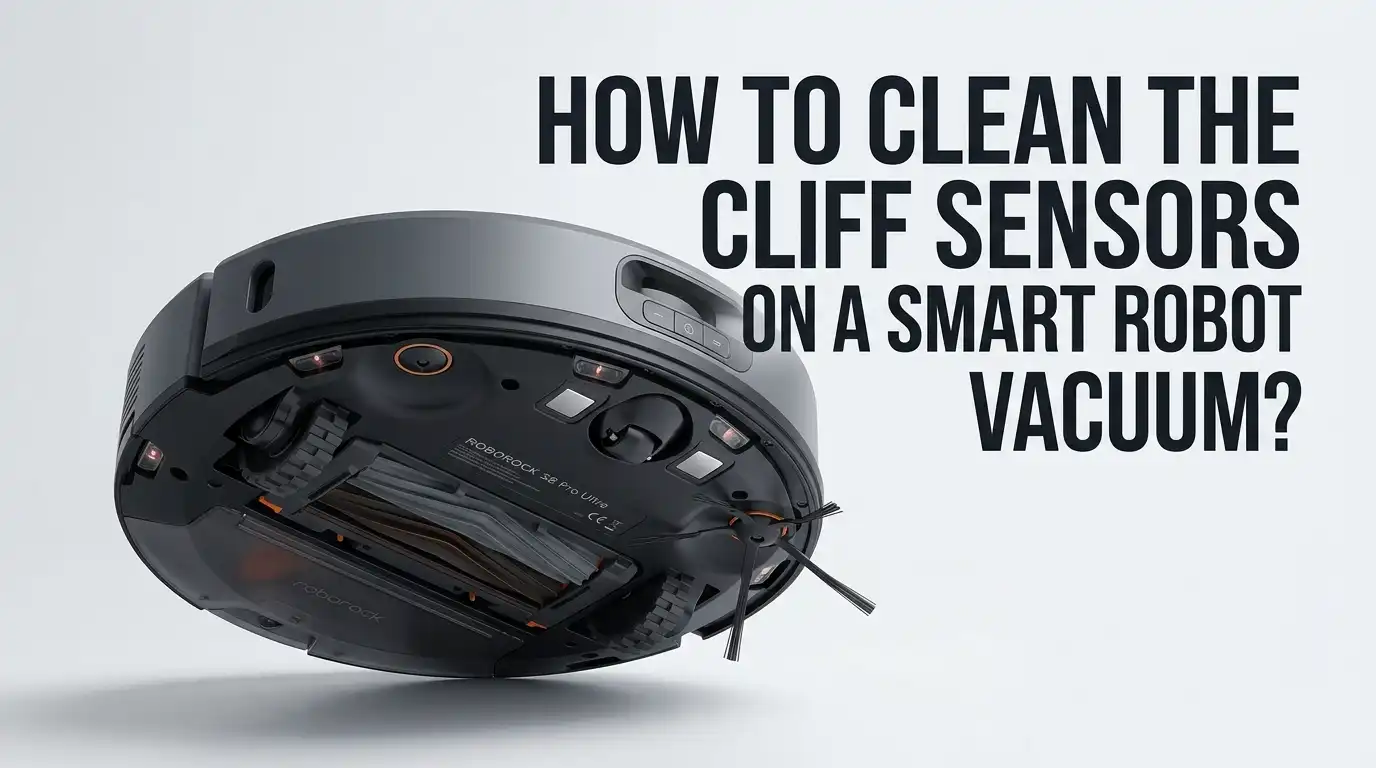
How To Clean The Cliff Sensors On A Smart Robot Vacuum?
Your smart robot vacuum glides across the floor, dodges furniture, and senses the edge of every staircase. That last trick relies on tiny parts called cliff sensors.
When these sensors get dirty, your vacuum starts acting strange. It may freeze near stairs, beep with error messages, or refuse to clean dark rugs. The good news is simple.
You can fix most of these problems yourself in under ten minutes. This guide walks you through every step. You will learn what cliff sensors do, why they fail, and how to clean them safely.
In a Nutshell:
- Cliff sensors prevent falls. They sit on the underside of your robot vacuum and use infrared light to detect stairs, ledges, and sudden drops. Dirty sensors cause false alarms and odd behavior.
- Dust and hair are the main enemies. A thin film of grime blocks the infrared beam. Your vacuum then thinks the floor is a cliff and stops moving.
- A microfiber cloth is your best tool. Soft, dry, and lint free cloths clean the sensor windows without scratching them. You rarely need anything stronger.
- Always power off first. Turn off and unplug your robot vacuum before you touch the sensors. This protects both you and the device.
- Clean them on a schedule. Wipe the sensors once a week for heavy use, or every two weeks for lighter use. Pets and dust mean more frequent cleaning.
- Avoid harsh chemicals. Alcohol, bleach, and strong sprays can damage the sensor coating. Stick to dry wiping or a lightly dampened cloth.
What Are Cliff Sensors And Why Do They Matter?
Cliff sensors are small infrared eyes built into the bottom of your robot vacuum. They sit near the front edge and along the underside. Each sensor sends out a beam of infrared light toward the floor.
The light bounces back, and the sensor reads the reflection. When the floor suddenly drops away, like at the top of a staircase, the light does not bounce back the same way. The vacuum reads this change and stops or turns around.
This simple system keeps your device from tumbling down stairs or off a raised landing. Without working cliff sensors, your expensive robot vacuum could fall and break in seconds. That is why keeping them clean matters so much for both safety and performance.
Why Cliff Sensors Get Dirty So Quickly
Your robot vacuum spends its life close to the floor. It sucks up dust, pet hair, crumbs, and fine dirt all day long. Some of that mess settles right on the sensor windows. The cliff sensors face downward, so gravity pulls debris straight onto them.
Over time, a thin layer of grime builds up. Even a light coating can block the infrared beam. Homes with pets, kids, or carpet tend to dirty the sensors faster.
Dark, fluffy floors also leave more residue behind. The sensors do not need to look filthy to stop working. A nearly invisible film of dust is often enough to confuse the device and trigger false cliff warnings during normal cleaning runs.
Signs Your Cliff Sensors Need Cleaning
Your robot vacuum tells you when something is wrong. You just need to read the signals. The most common sign is a vacuum that stops near stairs or ledges and refuses to move. You may also hear repeated beeping or see a flashing error light.
Some models display a “cliff sensor error” message in their app. Other warning signs include a vacuum that spins in circles, backs away from dark rugs, or quits in the middle of a clean.
If your robot suddenly avoids areas it used to clean fine, dirty sensors are often the cause. Watch for these clues. Catching the problem early saves you from a stuck or stranded device. A quick wipe usually clears these symptoms right away.
What You Need Before You Start Cleaning
Gathering your supplies first makes the job fast and smooth. You do not need fancy tools. A clean, dry microfiber cloth is the single most important item. It lifts dust without scratching the delicate sensor windows.
You may also want a cotton swab for tight corners and a small soft brush, like a clean toothbrush, for stubborn debris. A can of compressed air helps blow dust out of deep recessed sensors. Keep a flat, well lit surface ready, such as a table or counter.
Avoid paper towels, since they can leave lint and fine scratches behind. Have your user manual nearby too. It shows the exact sensor locations for your specific model, which speeds up the whole process.
Step By Step: How To Clean The Cliff Sensors
Follow these steps in order for the best results. First, turn off and unplug your robot vacuum to keep it safe. Second, flip the device over gently and rest it on a soft, flat surface. Third, find the cliff sensors.
They look like small clear or shiny windows set into the bottom edge, usually three to six of them. Fourth, take your dry microfiber cloth and wipe each sensor window with light, circular motions.
Fifth, for caked dirt, dampen the cloth slightly with water and wipe again, then dry it. Sixth, use a cotton swab or compressed air for any recessed spots. Finally, flip the vacuum back, power it on, and run a quick test. Your device should now move freely.
Wet Cloth Versus Dry Cloth: Pros And Cons
Many people wonder whether to wipe sensors dry or with a damp cloth. Both methods work, but each has trade offs. A dry microfiber cloth is the safest choice for routine cleaning.
It removes loose dust without any moisture risk. The main downside is that dry wiping struggles with sticky or greasy buildup. A slightly damp cloth tackles tough grime that a dry cloth leaves behind.
Dry cloth pros: zero moisture risk, fast, and ideal for weekly upkeep. Dry cloth cons: cannot remove sticky residue or dried spills.
Damp cloth pros: clears stubborn dirt and oily films. Damp cloth cons: too much water can seep inside and damage electronics. Always wring the cloth nearly dry and follow with a dry pass. When in doubt, start dry first.
Using Compressed Air And Cotton Swabs Safely
Some robot vacuums hide their cliff sensors inside small recessed slots. A flat cloth cannot reach deep into these gaps. Compressed air and cotton swabs solve this problem. A short burst of compressed air blows out trapped dust without any contact.
Hold the can upright and spray from a few inches away in quick bursts. Cotton swabs work well for gentle scrubbing inside narrow openings. Lightly dampen the tip if needed, then twist it across the sensor window.
Compressed air pros: no scratching, reaches deep spots fast. Cons: cans run out and can spray cold liquid if tilted wrong.
Cotton swab pros: precise and cheap. Cons: can shed cotton fibers if pressed too hard. Use light pressure with both tools to protect the sensors.
What To Avoid When Cleaning Cliff Sensors
A few common mistakes can damage your sensors for good. Never use harsh chemicals like alcohol, bleach, or window cleaner. These liquids can strip the protective coating off the sensor windows.
Strong solvents may also leave a residue that blocks the infrared beam permanently. Avoid pressing too hard, since heavy pressure can scratch or misalign the sensors. Do not use abrasive sponges, scouring pads, or rough paper towels.
Skip soaking the cloth, because dripping water can seep into the electronics inside. Never poke the sensors with sharp objects like pins or knives.
Finally, do not clean the sensors while the device is powered on. Stick to soft, dry, gentle methods, and your sensors will last for years. Patience beats force every time here.
How To Fix Cliff Sensor Errors After Cleaning
Sometimes a cleaning alone does not clear the error. If your vacuum still beeps or avoids stairs, try a few more steps. First, double check that you wiped every sensor, since missing even one causes problems.
Next, restart the device by powering it off and on again. Many models also offer a reset through the app or by holding two buttons together for several seconds. This recalibrates the sensors. Dark or black flooring can trick cliff sensors into reading a false drop, even when clean.
In that case, the floor color is the issue, not dirt. If errors continue after cleaning and resetting, the sensor itself may be faulty. Contact the manufacturer’s support team with your model number and a clear description of the behavior.
How Often Should You Clean The Cliff Sensors?
The right cleaning schedule depends on your home and habits. If you run your robot vacuum every day, wipe the cliff sensors once a week. Homes with pets, long hair, or lots of dust need this weekly routine the most. For lighter use, every two weeks or once a month works fine.
Pay attention to behavior changes as your real signal. If your vacuum starts acting odd before your scheduled clean, wipe the sensors right away. Many people add sensor cleaning to a larger weekly maintenance habit.
They empty the dust bin, clear the brushes, and wipe the sensors all at once. A regular schedule prevents most cliff sensor errors before they ever start. Consistency keeps your device safe and saves you future headaches.
DIY Cleaning Versus Professional Service: Pros And Cons
You can almost always clean cliff sensors yourself, but professional service exists for tough cases. Knowing the difference helps you decide. Doing it yourself is the standard choice for routine care. It costs nothing, takes minutes, and needs no special skill.
DIY pros: free, fast, and easy to do anytime. DIY cons: cannot fix broken or misaligned sensors hidden inside the device.
Professional service pros: handles hardware faults, internal damage, and tricky repairs. Cons: costs money, takes time, and may require shipping the device away.
For everyday dust and grime, DIY cleaning solves the problem nearly every time. Save professional help for cases where the sensors fail even after a thorough clean and reset. Most owners never need outside help for sensor cleaning at all. Start simple before spending money.
Extra Tips To Keep Cliff Sensors Working Longer
A little prevention reduces how often you clean. Keep your floors free of fine dust, pet hair, and clutter so less debris reaches the sensors. Vacuum or sweep heavy traffic areas now and then to lighten your robot’s load.
Set up no go zones in your app around very dusty corners or rooms under renovation. Store your robot vacuum in a clean, dry spot when not in use. Empty the dust bin often, since a full bin spreads more debris around the underside.
Check the wheels and brushes during your sensor cleaning, because tangled hair there affects movement too. Adding light colored tape over dark thresholds can also reduce false cliff readings on tricky floors. These small habits keep your sensors clear and your vacuum running smoothly for the long run.
Frequently Asked Questions
Can I use alcohol or rubbing alcohol to clean my cliff sensors?
No, you should avoid alcohol on your cliff sensors. Alcohol and other harsh chemicals can damage the protective coating on the sensor windows. They may also leave a residue that blocks the infrared light. A dry microfiber cloth is the safest and most effective option. For stubborn grime, use a cloth lightly dampened with plain water instead.
Why does my robot vacuum think the floor is a cliff?
Two common reasons cause this. Dirty sensors are the most frequent culprit, since dust blocks the infrared beam and confuses the device. The second reason is dark or black flooring. Very dark surfaces absorb infrared light instead of reflecting it, so the vacuum reads them as a drop. Clean the sensors first, then check your floor color if errors continue.
How do I know where the cliff sensors are located?
Cliff sensors sit on the underside of your robot vacuum, near the front edge and outer rim. They look like small clear or shiny windows, usually three to six in total. Flip your device over to spot them easily. Your user manual shows the exact positions for your specific model, which removes any guesswork.
Will cleaning the sensors fix all navigation problems?
Cleaning fixes most sensor related issues, but not every problem. Dirty cliff sensors cause false cliff warnings, stalling, and avoidance behavior, which a good wipe usually clears. However, tangled brushes, low battery, or software glitches can also affect movement. If cleaning and a reset do not help, the issue may lie elsewhere or with a faulty sensor.
How often should I clean the cliff sensors?
Clean them once a week for daily use, or every two weeks for lighter use. Homes with pets and heavy dust need more frequent cleaning. Watch your vacuum’s behavior too. If it starts acting strange near edges, wipe the sensors right away, even if it is not your scheduled cleaning day.
Is it safe to clean the sensors with the vacuum turned on?
No, always turn off and unplug your robot vacuum first. Cleaning a powered device risks electric issues and accidental movement. Powering down also protects the sensors from confusing signals during the wipe. Once you finish cleaning and the sensors are dry, turn the device back on and run a short test to confirm everything works.

Hi, I’m Grace Bell, the founder of CleanFloorVault.com, where I personally test and review vacuum cleaners to help you find the perfect tool for a spotless home.