
How to Dry a Wet Vacuum Roller Quickly to Prevent Bacterial Growth?
A wet vacuum roller sitting in moisture is a breeding ground for bacteria and mold. Bacteria can begin multiplying on damp surfaces within hours, and visible mold colonies can form in as little as 24 to 48 hours.
If your wet dry vacuum has a musty smell, you already have a problem. That lingering odor signals bacterial buildup, and it means your cleaning tool is spreading germs instead of removing them.
Many people finish mopping or wet vacuuming and simply park the machine in a closet. The roller stays damp, trapped inside a dark, enclosed space.
In a Nutshell
- Speed is everything. Bacteria can colonize a damp roller within a few hours. Mold spores start germinating in 24 to 48 hours. The faster you dry the roller, the smaller the window for microbial growth. Always remove the roller from the vacuum body immediately after use.
- Air drying alone may not be enough. While air drying works, it can take several hours depending on humidity and airflow. Using a fan, placing the roller near a heat source, or towel drying first can cut that time significantly.
- A self cleaning cycle helps but does not replace manual drying. Many modern wet dry vacuums have a self cleaning mode. This is useful, but you should still remove and inspect the roller regularly to ensure no moisture remains trapped in the bristles or end caps.
- Disinfection pairs with drying. A quick spray of diluted white vinegar or 70% isopropyl alcohol kills bacteria and helps the roller dry faster because alcohol evaporates quickly.
- Consistency matters more than perfection. Even a basic routine of removing, towel drying, and standing the roller upright after every use will dramatically reduce bacterial growth compared to doing nothing at all.
Why a Wet Vacuum Roller Grows Bacteria So Fast
Bacteria need three things to multiply: moisture, warmth, and organic matter. A wet vacuum roller provides all three. After mopping or wet vacuuming, the roller holds water, food particles, skin cells, pet dander, and dust. The inside of a vacuum body traps heat from the motor.
Research shows that bacteria like E. coli can survive up to 24 hours on damp surfaces. Staph bacteria can persist for several weeks in moist conditions. Mold spores begin germinating within 24 to 48 hours of moisture exposure. A roller left wet inside a dark closet hits every condition for rapid microbial growth.
The musty smell that many wet vacuum owners report is a direct result of this bacterial and mold activity. The odor compounds are waste products from these microorganisms. If your roller smells bad, it is already contaminated and needs both cleaning and thorough drying before next use.
Remove the Roller Immediately After Every Use
The first and most effective step is removing the roller from the vacuum body as soon as you finish cleaning. Do not leave the wet roller inside the machine. The enclosed space traps moisture and creates a humid microenvironment that accelerates bacterial growth.
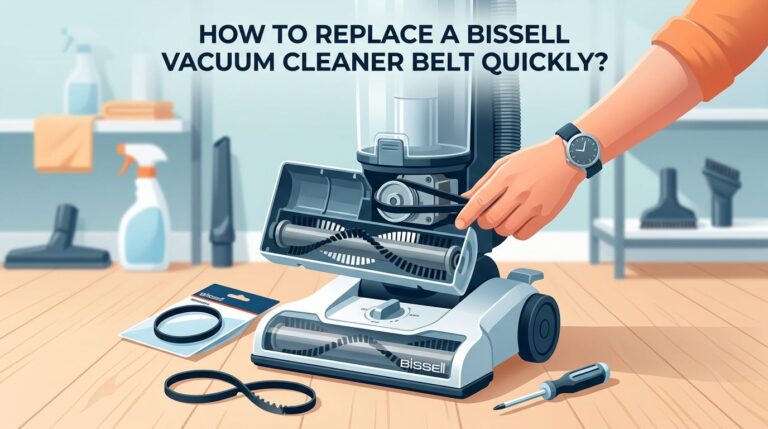
Most wet dry vacuums allow easy roller removal. Check your user manual for the release mechanism. Some models use a simple latch or twist lock. Others require you to remove a bottom plate with a screwdriver. Take a photo of the assembly before your first removal so you can reinstall everything correctly.
Once the roller is out, shake off excess water over a sink. This simple habit removes a surprising amount of moisture right away. It also dislodges loose debris that would otherwise sit in the wet bristles and feed bacteria.
Pros: Immediate moisture removal, prevents trapped humidity, takes less than 30 seconds.
Cons: Requires learning your vacuum’s disassembly process, adds a step to your cleaning routine.
Towel Dry the Roller First
Before you set the roller out to air dry, wrap it in a clean, dry towel and press firmly. Roll it back and forth a few times inside the towel. This absorbs a large portion of the surface moisture in seconds.
Use a microfiber towel for best results. Microfiber absorbs significantly more water than cotton and pulls moisture from between bristles more effectively. Press rather than rub. Rubbing can damage soft roller bristles or push debris deeper into the fibers.
Pay special attention to the end caps and bearing areas. These spots trap water and are hard to reach during air drying. Use a corner of the towel or a cotton swab to wick moisture from these hidden zones. Trapped water in end caps is one of the most common causes of persistent musty odors.
Pros: Fast, requires no special equipment, removes the bulk of moisture immediately.
Cons: Does not fully dry the roller, requires a clean towel each time.
Use a Fan for Faster Air Drying
After towel drying, place the roller in front of a fan to speed up evaporation. Moving air dries surfaces much faster than still air. Position the roller so that airflow reaches all sides evenly. You can prop it upright on a drying rack or lay it across two elevated supports.
A standard desk fan or floor fan works well. Point the airflow directly at the roller and leave it running for 30 to 60 minutes. In most indoor environments, this is enough to dry the roller completely.
If you live in a humid climate, consider running a dehumidifier in the same room. High ambient humidity slows evaporation and can leave the roller damp even after extended air drying. The goal is to get the roller bone dry within one to two hours of finishing your cleaning session.
Pros: Significantly cuts drying time, inexpensive, effective in most climates.
Cons: Requires access to a fan, less effective in very humid environments.
Try the Self Cleaning Mode on Your Vacuum
Many modern wet dry vacuums include a self cleaning cycle that rinses and sometimes heat dries the roller automatically. If your vacuum has this feature, use it after every cleaning session. The cycle typically runs for a few minutes and helps remove dirty water from the roller and internal channels.
Some premium models heat dry the roller at temperatures above 100°F. This heat kills many common bacteria and speeds up moisture evaporation. If your vacuum offers a hot air drying mode, always run it as part of your post cleaning routine.
However, self cleaning modes have limits. They may not fully dry the roller, especially in the end cap area. Always remove the roller and inspect it periodically, even if you rely on the self cleaning function. A quick visual and touch check tells you whether the roller is truly dry.
Pros: Hands free, kills bacteria with heat on some models, convenient.
Cons: Not all vacuums have this feature, may not dry the roller completely, uses battery power.
Use Diluted Vinegar or Alcohol as a Quick Disinfectant
Spraying the roller with a diluted white vinegar solution or 70% isopropyl alcohol serves two purposes. It kills bacteria on contact, and alcohol in particular evaporates quickly, which helps the roller dry faster.
To use vinegar, mix equal parts white vinegar and water in a spray bottle. Spray the roller lightly after towel drying and let it sit for five minutes before the final air dry. Vinegar is a natural deodorizer and breaks down organic residue that feeds bacteria.
For alcohol, spray 70% isopropyl alcohol directly on the roller surface. Do not dilute it further, as 70% is the ideal concentration for killing bacteria. The alcohol evaporates in minutes and leaves no residue. Avoid using undiluted bleach or harsh chemical cleaners, as these can damage plastic parts and degrade bristle material over time.
Pros: Kills bacteria, vinegar removes odors, alcohol speeds drying.
Cons: Requires a spray bottle, strong vinegar smell during application, alcohol may dry out some materials with repeated use.
Stand the Roller Upright While Drying
Orientation matters during drying. Standing the roller upright allows water to drain downward and exposes the maximum surface area to air. If you lay the roller flat on a surface, the bottom side stays in contact with moisture and dries much more slowly.
Place the roller vertically in a dish rack, cup, or any holder that keeps it stable. If the roller is too large to stand upright, prop it at an angle so no part rests in pooled water. Avoid placing the roller on a towel flat on a counter. The towel underneath will hold moisture against the roller and slow the drying process.
A well ventilated area with good light is the best drying location. Avoid closets, cabinets, or enclosed spaces. These areas trap humidity and recreate the exact conditions that cause bacterial growth inside the vacuum.
Pros: Improves airflow around the roller, uses gravity to drain water, costs nothing.
Cons: Roller may tip over without a proper holder, requires a ventilated drying spot.
Avoid Common Mistakes That Slow Drying
Several common habits work against fast drying and promote bacterial growth. Storing the vacuum in a bathroom or laundry room exposes the roller to high humidity even after cleaning. These rooms often have poor ventilation and fluctuating temperatures.
Another mistake is reassembling the vacuum before the roller is fully dry. Even a small amount of residual moisture trapped inside the vacuum body can cause mold within a day. Always touch the roller before reinstalling it. If any part feels cool or damp, give it more time.
Skipping the cleaning step before drying is also a problem. Dirt and organic matter on the roller hold moisture like a sponge. A dirty roller takes longer to dry and gives bacteria more food to consume. Always rinse or wipe the roller before setting it out to dry. Clean first, then dry. This order matters.
Set a Post Cleaning Routine That Takes Five Minutes
Consistency beats perfection. A short routine after every wet vacuuming session will keep your roller clean and dry without much effort. Here is a simple five minute process that works for most wet dry vacuum models.
First, run the self cleaning cycle if your vacuum has one. This takes one to three minutes. Second, remove the roller and shake off excess water over a sink. Third, wrap it in a clean towel and press firmly to absorb surface moisture. Fourth, spray lightly with diluted vinegar or alcohol. Fifth, stand it upright in a well ventilated area near a fan.
That is the entire routine. It takes about five minutes and dramatically reduces the chance of bacterial or mold growth. After 30 to 60 minutes of fan drying, check the roller. If it is fully dry, you can reassemble the vacuum or store the roller separately until the next use.
Know When to Replace the Roller
Even with good maintenance, vacuum rollers wear out over time. Bristles flatten, soft roller material degrades, and end cap bearings collect residue that is hard to fully remove. Most manufacturers recommend replacing the roller every three to six months with regular use.
Signs that your roller needs replacement include persistent odor despite cleaning, visibly worn or matted bristles, cracks in the roller body, and reduced cleaning performance. A damaged roller holds more moisture in its crevices, making it harder to dry and easier for bacteria to colonize.
Check your vacuum’s user manual for the correct replacement part. Using the wrong roller size or type can affect suction and motor performance. Fresh rollers dry faster and resist bacterial growth better than old, worn ones. Think of replacement as a hygiene investment, not just a performance upgrade.
Handle Stubborn Mold and Odor on an Existing Roller
If your roller already smells musty or shows signs of mold, a standard rinse will not fix the problem. You need a deeper treatment. Start by soaking the roller in warm water mixed with a tablespoon of baking soda for 15 to 20 minutes. Baking soda neutralizes odor compounds and loosens mold from the surface.
After soaking, scrub the roller with an old toothbrush. Pay close attention to seams, bristle bases, and end cap grooves. Rinse thoroughly and then spray with 70% isopropyl alcohol. The alcohol kills remaining mold spores that survived the soak.
For severe cases, some users find success soaking the roller in water with a capful of laundry sanitizer for a couple of hours. Always rinse completely after any chemical treatment and dry the roller fully before reinstalling. If the odor persists after two deep cleaning attempts, replace the roller. Mold that has penetrated the material will keep returning.
Clean the Vacuum Body and Channels Too
Drying the roller alone is not enough if the vacuum body, water tank, and internal channels remain wet. Bacteria and mold can grow inside the dirty water tank, along hoses, and in the roller housing. Empty and rinse the dirty water tank after every use.
Wipe the inside of the roller housing with a dry cloth or paper towel. Check for standing water in any internal channels or tubes. A pipe cleaner or long brush helps reach narrow spaces. Leave the dirty water tank lid open after cleaning to allow airflow.
Some users add a capful of mouthwash to the empty dirty water tank between uses. This helps prevent bacterial growth inside the tank without damaging the plastic. A clean, dry vacuum body combined with a clean, dry roller is your best defense against microbial contamination and bad odors.
Frequently Asked Questions
How long does it take for bacteria to grow on a wet vacuum roller?
Bacteria can begin multiplying within a few hours on a damp surface. Mold spores start germinating in 24 to 48 hours. This is why drying your vacuum roller quickly after each use is so important. The faster you remove moisture, the less time bacteria have to establish colonies on the roller surface.
Can I put my vacuum roller in the dryer or microwave to dry it faster?
No. Do not use a clothes dryer or microwave to dry your vacuum roller. The high heat can melt plastic components, warp the roller shape, and damage bristle material. Stick to towel drying followed by fan assisted air drying. These methods are safe and effective for all roller types.
How often should I deep clean my wet vacuum roller?
Deep clean the roller every two to four weeks with regular use. If you vacuum wet messes frequently, clean weekly. Pet owners and households with young children may also need more frequent deep cleaning. Clean immediately if you notice any musty odor or see visible debris buildup.
Is it safe to use bleach on a vacuum roller?
Diluted bleach can kill bacteria, but it may also damage plastic parts and degrade bristle material over time. White vinegar or 70% isopropyl alcohol are safer alternatives that still kill most common bacteria. If you do use bleach, dilute it heavily and rinse the roller thoroughly afterward.
What causes the musty smell in my wet dry vacuum?
The smell comes from bacteria and mold growing on damp surfaces inside the vacuum. The roller, dirty water tank, and internal channels are the most common sources. Drying the roller quickly after use, emptying the dirty water tank, and running the self cleaning cycle are the best ways to prevent this odor from developing.
Should I store the roller separately from the vacuum?
Storing the roller outside the vacuum body between uses is a great practice, especially if you do not use the vacuum daily. It allows continuous airflow around the roller and prevents moisture from being trapped inside the machine. Keep the roller in a dry, ventilated area until you are ready to use the vacuum again.

Hi, I’m Grace Bell, the founder of CleanFloorVault.com, where I personally test and review vacuum cleaners to help you find the perfect tool for a spotless home.