
How to Fix a Broken Drive Belt on an Upright Vacuum Cleaner Fast?
Your upright vacuum cleaner just stopped picking up dirt. The motor is running, but the brush roller at the bottom sits completely still. You can smell something burning. Sound familiar?
A broken drive belt is the most common reason an upright vacuum loses its cleaning power. The good news is you can fix this problem yourself in about 10 to 15 minutes with basic tools and a replacement belt that costs only a few dollars.
This guide walks you through every step of the process. You will learn how to spot a broken belt, remove the old one, install a new one, and avoid the same problem in the future.
In a Nutshell
- You can replace a vacuum belt yourself in under 15 minutes with just a screwdriver and a new belt. You do not need any special skills or expensive tools. The entire repair is one of the easiest DIY fixes for any household appliance.
- Always buy the correct replacement belt for your specific vacuum model. Belts are not universal. Using the wrong size will cause the belt to snap, slip, or fail to spin the brush roller at the right speed. Check your vacuum’s model number before you purchase a replacement.
- A burning rubber smell is the clearest warning sign that your belt is about to break or has already snapped. Other signs include a brush roller that does not spin, weak suction on carpets, and unusual squealing sounds from the vacuum head.
- Clean the brush roller every time you replace the belt. Tangled hair, string, and debris around the roller are the leading cause of premature belt failure. A clean roller spins freely and puts less strain on the new belt.
- Keep a spare belt at home so you are always ready for a quick fix. Belts are inexpensive and small enough to store in a drawer. Having one on hand means you never have to pause your cleaning routine for a trip to the store.
- Different belt types have different lifespans. Round rubber belts last about 3 to 6 months, flat belts last 6 to 9 months, and cogged or geared belts can last 1 to 2 years with proper care.
What Does a Drive Belt Do in an Upright Vacuum Cleaner
The drive belt is a small rubber or synthetic loop inside the base of your vacuum. It connects the motor shaft to the brush roller (also called an agitator brush). The motor spins the belt, and the belt spins the brush roller.
The brush roller is the cylinder with bristles that you see on the bottom of your vacuum. It rotates at high speed and beats dirt and debris out of carpet fibers. Without the belt, the brush roller cannot spin, and your vacuum loses most of its cleaning ability.
Your vacuum will still create suction with a broken belt. But it will only pick up surface debris. Embedded dirt, pet hair, and fine dust will stay trapped in your carpet. That is why a broken belt makes such a noticeable difference in cleaning performance.
How to Tell if Your Vacuum Drive Belt Is Broken
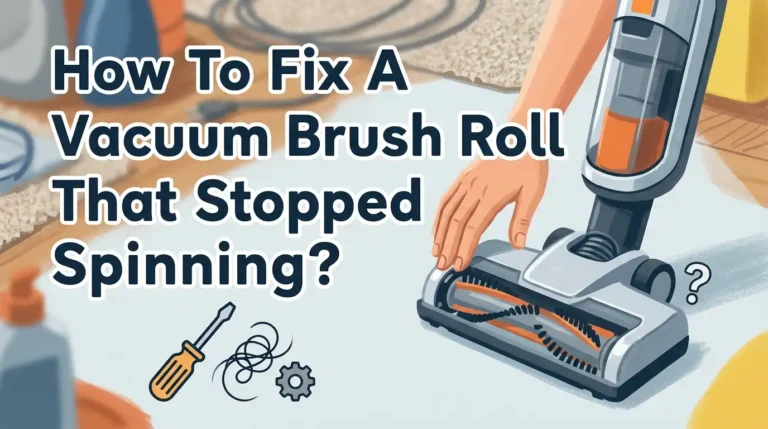
Several clear signs point to a broken or worn drive belt. The most obvious sign is a brush roller that does not spin at all. Turn your vacuum upside down, power it on briefly, and look at the roller. If it sits still while the motor runs, the belt is likely broken.
A burning rubber smell is another strong indicator. This happens when the belt slips on the motor shaft and generates heat from friction. You may also notice loud squealing or squeaking noises from the vacuum head, which means the belt is struggling to grip.
Reduced cleaning performance is a subtler sign. If your vacuum leaves behind debris it used to pick up easily, the belt may be stretched and slipping. Check the belt visually for cracks, glazing (a shiny hardened surface), fraying, or obvious breaks. Any of these signs means it is time for a replacement.
Tools and Supplies You Need for the Repair
You do not need a full toolbox for this job. Gather these basic items before you start, and the entire process will go smoothly.
You will need a Phillips head screwdriver or a flathead screwdriver, depending on your vacuum model. Some newer vacuums use quick release latches instead of screws, so you may not need a screwdriver at all. You also need a new replacement belt that matches your vacuum’s model number exactly.
A pair of scissors is helpful for cutting away tangled hair and string from the brush roller. A clean dry cloth helps you wipe down the belt area and brush roller bearings. That is all you need. The total cost of this repair is usually under five dollars for the belt alone.
Pros: Extremely low cost, minimal tools required, fast completion time.
Cons: You must identify the correct belt for your specific model, which requires knowing your vacuum’s model number.
How to Find the Right Replacement Belt for Your Vacuum
Getting the exact correct belt is the most important part of this repair. Vacuum belts are not interchangeable between models. Even belts that look similar can differ in length, width, and thickness.
Find your vacuum’s model number first. It is usually printed on a sticker or plate on the back or bottom of the machine. Write it down. Use this number to search for the correct belt at a hardware store, vacuum repair shop, or the manufacturer’s website.
There are four main belt types. Round belts are tube shaped and are found on older vacuum models. Flat belts are the most common type today and offer better grip. Cogged (geared) belts have teeth on the inside that fit into a sprocket on the brush roller. V belts taper inward and sit in a matching groove on the roller.
Never guess at the belt size. A belt that is too tight will snap immediately. A belt that is too loose will slip and fail to spin the roller at full speed.
Step by Step Guide to Removing the Old Belt
Start by unplugging your vacuum from the wall outlet. This is a critical safety step. Lay the vacuum flat on the floor with the bottom plate facing up.
Locate the screws or latches that hold the bottom plate in place. Remove them with your screwdriver and set the plate and screws aside in a safe spot. You should now see the brush roller and the belt (or the remnants of a broken belt).
Take a moment to observe how the belt is routed before you remove it. The belt wraps around the brush roller on one end and loops around the motor shaft on the other end. Note this path so you can install the new belt correctly.
Gently lift the brush roller out of its housing. The belt will slide off with the roller. If the belt is broken, remove any remaining pieces from around the motor shaft. Do not leave old belt fragments inside the machine.
Pros: Simple removal process on most models, no special tools needed.
Cons: Some vacuum models have more complex assemblies that require removing additional screws or brackets.
How to Clean the Brush Roller Before Installing a New Belt
This step is easy to skip, but it makes a huge difference in how long your new belt will last. A dirty brush roller is the leading cause of premature belt failure.
Pull out the brush roller and examine it closely. You will likely see tangled hair, thread, string, and carpet fibers wound tightly around the bristles and the end caps. Use scissors to carefully cut through these tangles and pull them away. Be careful not to cut the bristles themselves.
Wipe down the roller bearings at each end with a dry cloth. These bearings must spin freely. If a bearing is seized or sticky, the roller will resist spinning, and that extra strain will destroy your new belt quickly.
Spin the roller by hand after cleaning it. It should rotate smoothly without catching or stopping. If it does not spin freely, you may need to replace the roller itself or its bearings.
Pros: Extends new belt life significantly, improves cleaning performance, costs nothing.
Cons: Takes a few extra minutes, may require scissors for stubborn tangles.
How to Install the New Drive Belt Correctly
Take your new belt out of the package. If the belt has letters or markings on one side, keep that side facing outward. This ensures the smooth gripping surface contacts the motor shaft and brush roller.
First, loop the belt around the motor shaft. The motor shaft is a small metal post inside the vacuum housing. Slide the belt onto it securely. Then take the other end of the belt and stretch it over the brush roller. The belt should fit snugly in the designated groove on the roller.
Now place the brush roller back into its housing. You may need to gently pull the belt to create enough tension to fit the roller back into its slots. Make sure the roller sits flat in its brackets and the end caps lock into place.
Give the brush roller a spin by hand. It should turn smoothly, and you should feel the belt grip and resist slightly. If the belt feels loose or the roller wobbles, recheck your installation.
How to Reassemble and Test Your Vacuum
Place the bottom plate back onto the vacuum base. Align the screw holes or latches and fasten everything securely. Make sure no screws are missing or loose. A loose bottom plate can vibrate and create noise during operation.
Stand the vacuum upright and plug it back into the wall. Turn it on and listen carefully. You should hear the motor running and the brush roller spinning. The sound should be smooth and consistent. Look at the bottom of the vacuum head to confirm the roller is spinning at full speed.
Run the vacuum over a small section of carpet. It should pick up dirt and debris with the same power you remember. If you hear unusual thumping or vibration, turn the vacuum off and check that the brush roller is seated correctly and the end caps are fully secured.
Pros: Quick reassembly, immediate results, no calibration needed.
Cons: Occasional issues with roller seating may require a second attempt at reassembly.
Common Mistakes to Avoid During Belt Replacement
The most frequent mistake is installing the wrong belt size. Even a small difference in belt dimensions causes problems. Always match the belt to your vacuum’s model number, not just the brand name.
Another common error is forgetting to clean the brush roller. A roller clogged with hair creates drag that overheats and snaps the new belt within minutes. Always clean the roller before you put a new belt on.
Some people twist the belt during installation without realizing it. A twisted belt wears unevenly and loses tension faster. Make sure the belt lies flat against both the motor shaft and the brush roller with no twists or folds.
Reinstalling the brush roller without checking that it spins freely is another mistake. If the bearings are seized, the belt cannot do its job. Finally, do not overtighten screws on the bottom plate. Snug is enough. Overtightening can crack the plastic housing on some models.
How Often Should You Replace a Vacuum Drive Belt
Belt replacement frequency depends on the type of belt your vacuum uses and how often you vacuum. Round rubber belts stretch the fastest and need replacement every 3 to 6 months. Flat belts last longer, usually 6 to 9 months.
Cogged and geared belts are the most durable. They can last 1 to 2 years under normal household use. However, even these stronger belts need periodic inspection for wear and damage.
A good rule of thumb is to inspect your belt every time you clean or replace your vacuum’s filters. Look for signs of stretching, cracking, or glazing. If the belt looks worn, replace it right away rather than waiting for it to snap.
Pros of regular replacement: Consistent cleaning power, fewer unexpected breakdowns, longer vacuum life.
Cons of regular replacement: Small recurring cost, requires you to keep spare belts on hand.
Tips to Make Your Vacuum Belt Last Longer
Prevention saves you time and money. The single best habit you can build is removing hair and string from the brush roller after every few uses. This reduces strain on the belt and keeps the roller spinning freely.
Adjust your vacuum’s height setting to match your floor type. A setting that is too low presses the brush roller hard against the carpet, which creates extra friction and wears the belt faster. Use a higher setting for thick carpets and a lower setting for hard floors.
Avoid vacuuming over loose carpet edges, tassels, or long fringe. These items get sucked into the roller and jam it instantly, which can snap the belt in seconds. Pick up large objects like coins, small toys, and paper clips by hand before you vacuum.
Store your vacuum in a cool, dry place. Heat and humidity can degrade rubber belts even when the vacuum is not in use. Keeping a spare belt nearby ensures you can fix the problem the moment it happens.
When to Call a Professional Instead of DIY Repair
Most belt replacements are simple enough for anyone to handle at home. But some situations call for professional help. If your brush roller bearings are seized and you cannot free them, a repair technician can replace the entire roller assembly.
If the motor shaft is damaged or does not spin, the problem goes beyond the belt. A faulty motor or a broken drive mechanism requires diagnostic tools and parts that most homeowners do not have.
Persistent problems after a belt replacement also warrant a professional visit. If the new belt keeps breaking or the roller still does not spin correctly, there may be a deeper mechanical issue. A trained technician can identify problems with the clutch, drive gears, or internal wiring that you cannot see from the outside.
Pros of professional repair: Accurate diagnosis, access to all parts, warranty on work.
Cons of professional repair: Higher cost than DIY, may require leaving your vacuum at the shop for a day or two.
Frequently Asked Questions
Can I use my vacuum cleaner without a drive belt?
Technically, yes. The motor will still run and the vacuum will still create suction. But the brush roller will not spin. This means your vacuum will only pick up loose surface debris. It will not clean carpets effectively because it cannot agitate the fibers to release embedded dirt and pet hair. You should replace the belt as soon as possible to restore full cleaning power.
How much does a replacement vacuum belt cost?
A replacement vacuum belt typically costs between two and eight dollars depending on the brand and belt type. Cogged and geared belts tend to cost slightly more than flat or round rubber belts. The repair itself costs nothing extra if you do it yourself. This makes belt replacement one of the cheapest vacuum repairs you can do at home.
Why does my new vacuum belt keep breaking?
A new belt that breaks right away usually points to a jammed or seized brush roller. Check the roller bearings and remove all tangled hair and debris. Also confirm that you are using the correct belt for your vacuum’s model number. An incorrectly sized belt that is too small or too tight will snap under the strain of the motor.
Can I use a rubber band as a temporary vacuum belt?
This is not recommended. A rubber band does not have the correct tension, thickness, or durability to drive a brush roller at the right speed. It will snap almost immediately or slip and melt from friction. Always use a proper replacement belt made for your vacuum model to avoid damaging the motor shaft or brush roller.
How do I find my vacuum cleaner’s model number?
The model number is usually printed on a label or sticker on the back, bottom, or inside the dust bag compartment of your vacuum. Some brands also print it on the front near the logo. Write this number down and use it to search for the exact replacement belt your machine requires. The owner’s manual also lists the model number on the first few pages.
Is it worth repairing an old vacuum or should I buy a new one?
If the only problem is a broken belt, the repair is absolutely worth it. A new belt costs a few dollars and takes minutes to install. However, if your vacuum has multiple issues such as a failing motor, cracked housing, or worn out suction system, the cost of all those repairs may exceed the price of a new machine. Use the belt replacement as a test. If the vacuum works well with a new belt, keep using it.

Hi, I’m Grace Bell, the founder of CleanFloorVault.com, where I personally test and review vacuum cleaners to help you find the perfect tool for a spotless home.