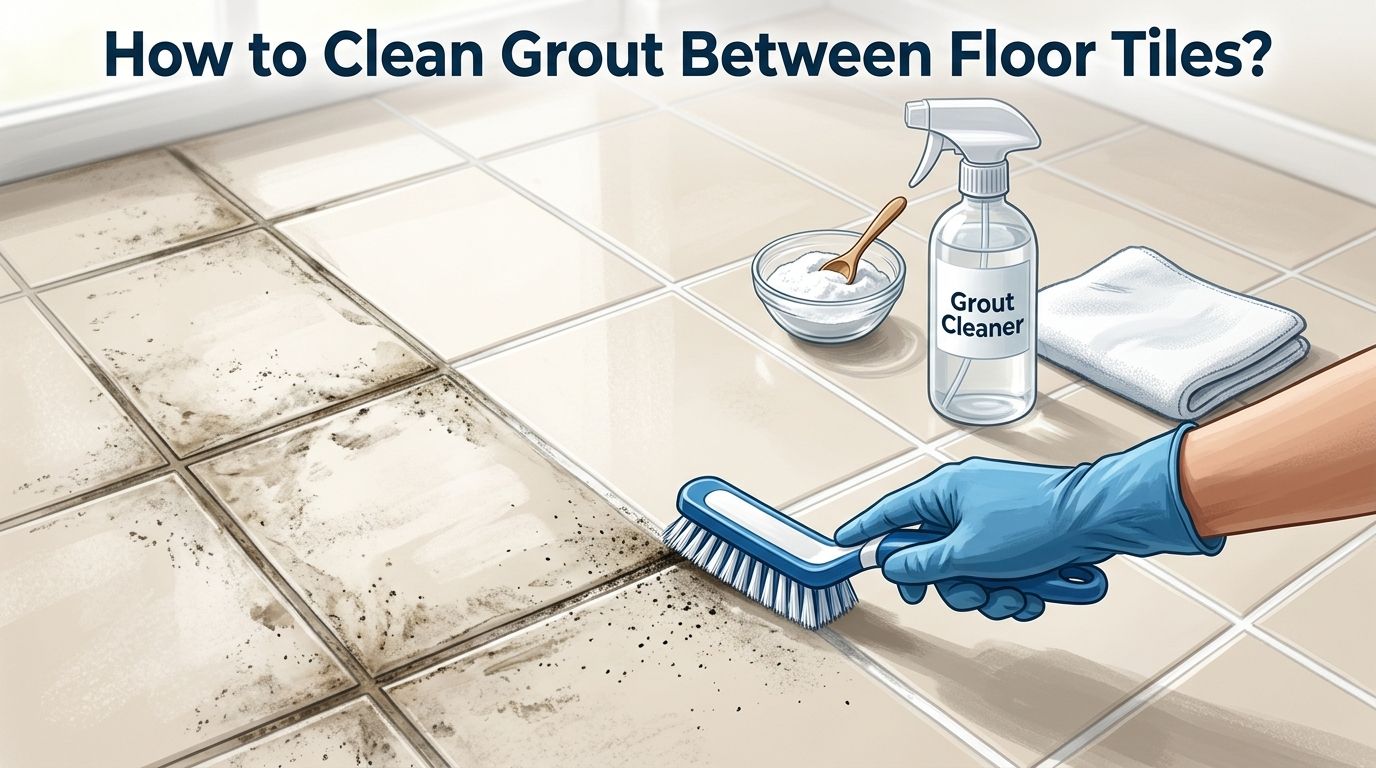
How to Clean Grout Between Floor Tiles? 11 Proven Methods
Dirty grout can turn even the most beautiful tile floor into an eyesore. That dark, stained line between your tiles collects dirt, grease, mold, and bacteria over time. You might have tried wiping it down with a wet mop, but that rarely does the job.
The good news is you do not need to spend a fortune on professional cleaning services. Several simple methods use items you probably already own. This guide walks you through 11 tested approaches to restore your grout to its original color.
Whether you are dealing with light surface grime or deep set stains, there is a solution here for you. Keep reading to find step by step instructions, the pros and cons of each method, and expert tips to keep your grout looking fresh for months.
Key Takeaways
- Baking soda and hydrogen peroxide make one of the most effective homemade grout cleaners. Mix half a cup of baking soda with a quarter cup of hydrogen peroxide and a teaspoon of dish soap. Apply the paste, wait ten minutes, and scrub with a stiff brush. This method works well for moderate stains without harsh fumes.
- Steam cleaning is the best chemical free option for killing bacteria and lifting dirt from grout lines. It works on all grout types but should be used carefully on grout that is less than one year old. Always keep the steam nozzle moving to avoid concentrated heat damage.
- Vinegar should be used with caution because its acidity can dissolve the top layer of grout over time. If you do use it, dilute it with equal parts water and do not let it sit for more than five minutes.
- Sealing your grout after cleaning is just as important as the cleaning itself. Most residential grout needs resealing every 12 to 18 months. High moisture areas like bathrooms may need resealing every 6 to 12 months.
- Avoid common mistakes such as using too much water, scrubbing with metal brushes, and mixing bleach with vinegar. These errors can weaken grout, scratch tiles, or create dangerous fumes.
- Regular maintenance prevents deep stains. A quick weekly wipe with warm water and dish soap keeps grout clean and reduces the need for heavy scrubbing sessions.
Why Grout Gets Dirty So Quickly
Grout is a porous material. It absorbs moisture, dirt, oils, and cleaning product residue like a sponge. Every time you walk across the floor, tiny particles of dust and soil settle into those narrow lines between tiles. Kitchen floors face grease splatters and food spills. Bathroom grout deals with soap scum, body oils, and constant humidity.
Unsealed grout stains much faster than sealed grout because there is no protective barrier. Mold and mildew also thrive in damp grout, especially in poorly ventilated rooms. The textured surface of grout traps particles that a regular mop simply pushes around rather than removes.
Understanding why grout gets dirty helps you pick the right cleaning method. Light surface dirt responds well to gentle cleaners. Deep set stains and mold require stronger solutions or specialized tools.
Gather Your Supplies Before You Start
Having all your supplies ready saves time and prevents interruptions. You will need a few basic items regardless of which cleaning method you choose. Start with a stiff bristle brush or an old toothbrush for scrubbing grout lines. A spray bottle helps apply liquid solutions evenly.
Keep clean rags, a bucket of warm water, and rubber gloves on hand. Knee pads are a smart addition if you plan to clean a large floor area. For tougher jobs, consider getting a grout brush with a narrow head that fits perfectly into grout lines.
Pro tip: Always sweep or vacuum the floor before wet cleaning. Loose dirt and debris mixed with water create muddy paste that pushes deeper into the grout. Starting with a clean, dry surface makes every method more effective.
Method 1: Baking Soda and Hydrogen Peroxide Paste
This is one of the most popular and effective homemade grout cleaners. Mix half a cup of baking soda with a quarter cup of hydrogen peroxide and one teaspoon of dish soap in a small bowl. Stir until you get a thick paste. Apply the paste directly onto the grout lines using a spoon or your fingers.
Let the paste sit for 5 to 10 minutes. The baking soda provides gentle abrasion while the hydrogen peroxide lifts stains through oxidation. Scrub with a stiff brush in small circular motions. Rinse the area with clean water and wipe dry with a cloth.
This method works best on white or light colored grout. It can lighten dark colored grout, so test a small hidden area first.
Pros: Inexpensive, no harsh fumes, uses common household items, effective on moderate stains.
Cons: Requires hands and knees scrubbing, may lighten colored grout, not strong enough for severe mold.
Method 2: Vinegar and Baking Soda Fizz
Sprinkle a generous amount of dry baking soda along the grout lines. Then spray or pour white vinegar over the baking soda. The mixture will fizz and bubble on contact. This fizzing action helps loosen surface dirt and grime from the porous grout surface.
Let the fizzing reaction work for about 3 to 5 minutes. Scrub the grout with a stiff brush, then rinse with warm water. Dry the floor thoroughly after rinsing to prevent moisture from soaking back into the grout.
Important warning: Vinegar is acidic. Using it frequently or leaving it on grout too long can erode the grout surface. This method works best as an occasional deep clean rather than a weekly routine. Never use vinegar on natural stone tiles like marble or travertine because the acid will etch and damage the stone.
Pros: Creates a satisfying fizzing action that loosens dirt, very affordable, no harsh chemical smell.
Cons: Acid can damage grout over time, not safe for natural stone, limited effectiveness on deep stains.
Method 3: Oxygen Bleach Soak
Oxygen bleach is a powerful yet gentle cleaner for grout. Dissolve two tablespoons of powdered oxygen bleach in two cups of warm water. Apply the solution generously over the grout lines. You want the grout to be fully saturated with the liquid.
Let the solution sit for 15 to 30 minutes. The oxygen bleach breaks down organic stains, mold, and mildew at a molecular level. After soaking, scrub lightly with a brush and mop the floor with clean water. Oxygen bleach is color safe and does not produce the harsh fumes that chlorine bleach does.
This method excels at removing deep set stains and mold that gentler cleaners cannot handle. It is safe for colored grout and most tile types.
Pros: Color safe, effective on deep stains and mold, no toxic fumes, works with minimal scrubbing.
Cons: Requires a 15 to 30 minute soak time, must mix fresh solution each time for best results, can irritate sensitive skin without gloves.
Method 4: Steam Cleaning for Chemical Free Results
Steam cleaning uses high temperature water vapor to blast dirt and bacteria from grout lines. A handheld steam cleaner with a narrow nozzle attachment works best for this task. Hold the nozzle about one inch from the grout and move slowly along each line.
The steam reaches temperatures above 200 degrees Fahrenheit, which kills mold spores and bacteria on contact. No chemicals are needed, making this the safest option for homes with children, pets, or people with chemical sensitivities. Wipe the loosened dirt with a clean cloth as you work.
Be careful with new grout that is less than one year old. High pressure steam can weaken fresh grout. Also avoid concentrating steam in one spot for too long, as excessive heat may crack older or damaged grout.
Pros: Chemical free, kills bacteria and mold, fast results, safe for most tile types.
Cons: Requires a steam cleaner, can damage new or fragile grout, not effective on oily stains without additional cleaning agents.
Method 5: Dish Soap and Warm Water for Light Cleaning
Sometimes the simplest approach is the best one. Mix a few drops of dish soap into a bucket of warm water. Dip a stiff brush into the solution and scrub the grout lines. This method works well for regular maintenance cleaning and light surface dirt.
Dish soap cuts through grease and lifts surface grime without damaging grout or tiles. Rinse the floor with clean water after scrubbing to remove all soap residue. Leftover soap film can actually attract more dirt if not rinsed properly.
This should be your go to weekly cleaning method. It keeps grout looking fresh between deeper cleaning sessions and prevents stain buildup. Consistency matters more than intensity for long term grout maintenance.
Pros: Extremely gentle, safe for all grout and tile types, inexpensive, no fumes.
Cons: Not effective on set in stains, requires frequent application, does not kill mold or bacteria.
Method 6: Chlorine Bleach for Stubborn Mold
For severe mold and mildew, diluted chlorine bleach is a powerful option. Mix three quarters of a cup of bleach into one gallon of water. Apply the solution to the grout with a spray bottle or sponge. Let it sit for 5 to 10 minutes but do not allow it to dry on the surface.
Scrub with a nylon brush and rinse thoroughly with clean water. Open windows and turn on fans for proper ventilation because bleach fumes can irritate your lungs and eyes. Always wear rubber gloves and avoid skin contact.
Never mix bleach with vinegar, ammonia, or hydrogen peroxide. These combinations create toxic gases that are dangerous to breathe. Chlorine bleach can also discolor colored grout, so this method is best for white grout only.
Pros: Highly effective against mold and mildew, strong whitening power, affordable.
Cons: Produces harsh fumes, can discolor grout, requires ventilation, dangerous if mixed with other chemicals.
Method 7: Commercial Grout Cleaners
Store bought grout cleaners are formulated specifically for this job. They come in spray, gel, and foam forms. Gel and foam versions tend to cling to vertical grout lines better than sprays. Read the label carefully and follow the instructions for application time and rinsing.
Choose a cleaner that matches your grout type. Some products are made for sanded grout, while others work on unsanded or epoxy grout. Alkaline cleaners are generally safer for grout than acidic formulas. Test any new product on a small, hidden area before applying it to your entire floor.
Commercial cleaners often contain surfactants and oxidizers that break down stains faster than homemade solutions. They save time on heavily soiled floors where DIY methods fall short.
Pros: Specifically formulated for grout, available in multiple forms, often faster than DIY methods.
Cons: More expensive than homemade solutions, some contain harsh chemicals, may require ventilation.
Method 8: Electric Spin Brushes Save Your Knees
An electric spin brush or power scrubber takes the physical effort out of grout cleaning. These battery powered tools rotate a small brush head at high speed, doing the scrubbing work for you. Pair the spin brush with any of the cleaning solutions mentioned above.
Hold the brush at a slight angle and guide it along the grout lines. The rotating bristles clean faster and more evenly than manual scrubbing. This tool is especially helpful for large floor areas or people with joint pain or limited mobility.
Make sure you use a brush head with nylon or soft bristles. Wire or metal brush heads will scratch your tiles and damage the grout surface. Replace brush heads when the bristles become flattened or worn.
Pros: Reduces physical effort, cleans faster than hand scrubbing, great for large areas, good for people with mobility issues.
Cons: Requires purchasing the tool, battery needs charging, brush heads need regular replacement.
Common Mistakes That Damage Your Grout
Many people accidentally harm their grout while trying to clean it. Using too much water is one of the biggest errors. Excess water seeps into porous grout and weakens the bond between tiles. Always wring out mops and cloths well and dry the floor after cleaning.
Metal brushes and steel wool are too abrasive for grout and tiles. They scratch tile surfaces and tear apart grout. Stick to nylon bristle brushes instead. Another common mistake is using the dirty mop water to “rinse” the floor. You are just spreading dirty water around.
Mixing cleaning chemicals is dangerous and counterproductive. Bleach and vinegar create chlorine gas. Bleach and ammonia produce toxic fumes. Hydrogen peroxide and vinegar form a mild acid that can irritate skin and eyes. Use one cleaning agent at a time and rinse the floor between different products.
How to Seal Grout After Cleaning
Sealing grout after cleaning is a critical step that many homeowners skip. A grout sealer creates a protective barrier that prevents moisture, dirt, and stains from penetrating the porous grout surface. Wait until the grout is completely dry before applying sealer, usually 24 to 48 hours after cleaning.
Apply the sealer with a small brush or a sealer applicator bottle directly onto the grout lines. Avoid getting sealer on the tile surface because it can leave a hazy film. Wipe away any excess immediately with a clean cloth. Let the sealer cure according to the manufacturer’s instructions before walking on the floor.
Reseal your grout every 12 to 18 months for standard living areas. Bathrooms and kitchen floors exposed to heavy moisture may need resealing every 6 to 12 months. A quick test is to drop a few drops of water on the grout. If the water soaks in instead of beading up, it is time to reseal.
Tips for Keeping Grout Clean Longer
Prevention is easier than heavy cleaning. Wipe up spills immediately before they soak into the grout. Place mats at doorways to trap dirt and sand before it reaches your tile floors. Remove shoes at the door to reduce the amount of soil tracked across the floor.
Clean your tile floors weekly with warm water and a small amount of dish soap. This prevents dirt from building up in the grout lines. Use a microfiber mop instead of a traditional cotton mop because microfiber picks up more dirt without excess water.
Run the bathroom exhaust fan during and after showers to reduce humidity. Excess moisture encourages mold growth in grout. In kitchens, keep the area around the stove clean to prevent grease from settling into floor grout. A little regular effort saves hours of deep cleaning later.
When to Call a Professional
Some grout problems go beyond what DIY cleaning can fix. If your grout is cracked, crumbling, or missing in spots, cleaning will not help. You need regrouting, which involves removing the old grout and replacing it with fresh material. A professional tile installer can do this efficiently.
Severe mold infiltration that returns within days of cleaning may indicate a moisture problem behind the tiles. A professional can assess whether there is a leak or ventilation issue causing the recurring mold.
If you have tried multiple cleaning methods and the grout still looks dark or stained, the discoloration may be permanent. Professional tile and grout cleaning services use truck mounted hot water extraction systems and commercial grade solutions that reach deeper than household tools. They can also restore and recolor grout to give it a completely fresh appearance.
Frequently Asked Questions
What is the best homemade grout cleaner?
A paste made from half a cup of baking soda, a quarter cup of hydrogen peroxide, and one teaspoon of dish soap is widely considered the best homemade grout cleaner. Apply the paste, wait 5 to 10 minutes, scrub with a stiff brush, and rinse with clean water. This combination is effective on moderate stains and safe for most grout types.
Can vinegar damage grout between tiles?
Yes, vinegar can damage grout over time. Its acidic nature dissolves the top layer of grout with repeated use. If you choose to use vinegar, dilute it with equal parts water and limit contact time to five minutes or less. Never use vinegar on natural stone tiles.
How often should I clean grout on floor tiles?
Light maintenance cleaning with warm water and dish soap should happen once a week. A deeper clean using baking soda paste, oxygen bleach, or steam should be done every one to three months depending on foot traffic and how quickly your grout shows dirt.
Does steam cleaning damage grout?
Steam cleaning is generally safe for cured, well maintained grout. It can damage grout that is less than one year old or grout that is already cracked and fragile. Keep the steam nozzle moving and avoid holding it in one spot to prevent heat damage.
Should I seal grout after cleaning it?
Yes, sealing grout after a deep clean is highly recommended. A sealer blocks moisture and stains from penetrating the porous grout surface. Most residential grout needs resealing every 12 to 18 months. Bathrooms may need it more often due to constant moisture exposure.
How do I remove black mold from grout?
For black mold, use diluted chlorine bleach (three quarters cup per gallon of water) or an oxygen bleach soak. Apply the solution, let it sit for 10 to 15 minutes, scrub with a nylon brush, and rinse thoroughly. Ensure good ventilation and wear gloves. If mold returns quickly, consult a professional to check for hidden moisture problems.

Hi, I’m Grace Bell, the founder of CleanFloorVault.com, where I personally test and review vacuum cleaners to help you find the perfect tool for a spotless home.